DIY farmhouse Easter decor
Decorating for Easter is a fun and festive way to hop into the holiday spirit. Farmhouse decor is a popular trend that adds a cozy and rustic touch to any home. Why not combine the two and create your own DIY farmhouse Easter decor?
This Easter decor idea is easy and affordable, plus you can make it uniquely yours. You can also gather your friends and family for a fun project!
Farmhouse decor has become a beloved style choice for many. It’s cozy and welcoming, mixing rustic charm with modern simplicity. Adding this style to your Easter decorations gives a special touch and makes the holiday vibe cozy and inviting.

With DIY projects on the rise, creating your own farmhouse-inspired Easter decorations has never been easier. You can feel free to get creative by using recycled materials or adding colors and patterns that suit your home.
Now let’s get crafting for your Easter celebration!
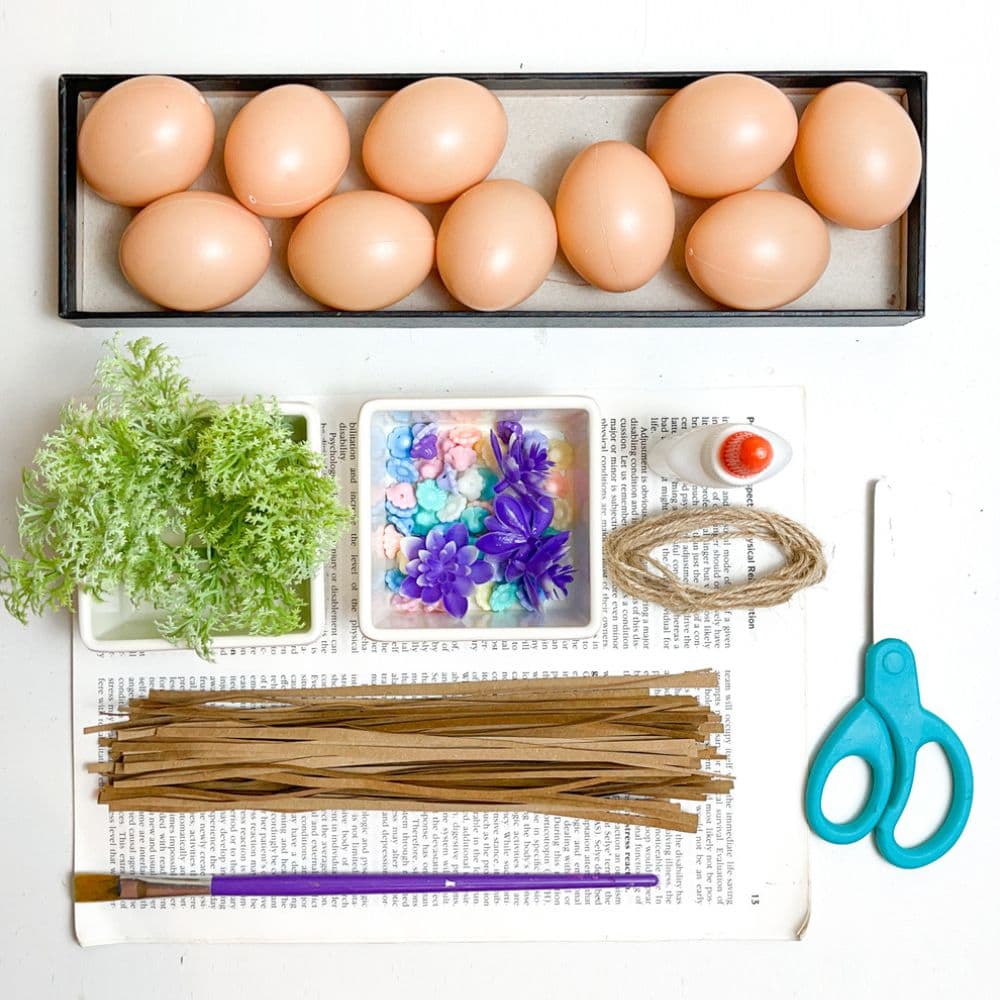
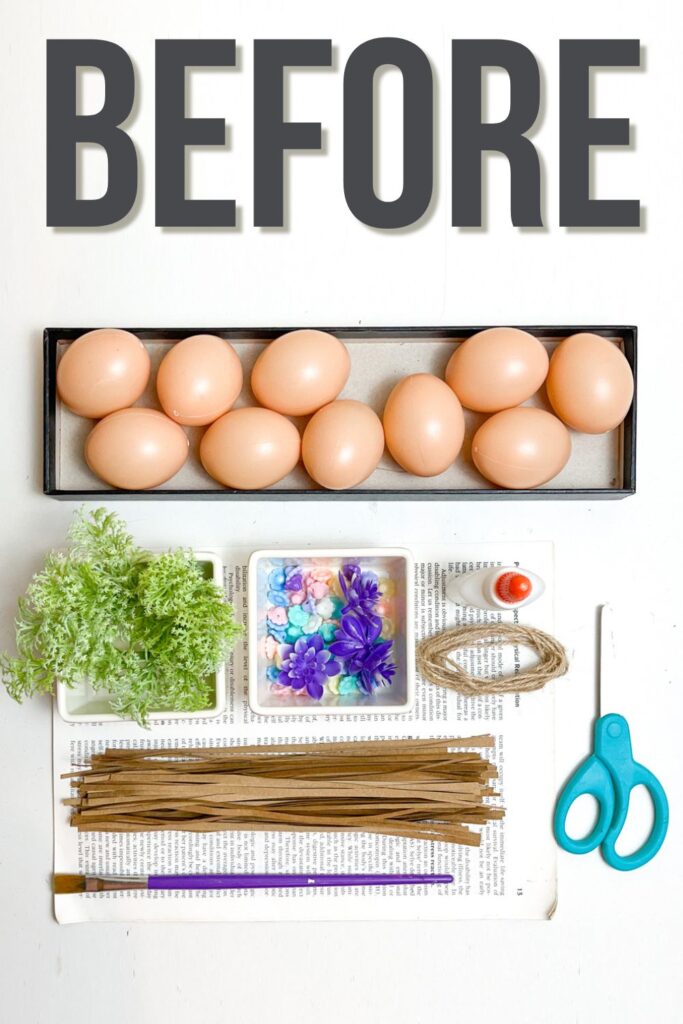
Supplies Used for DIY Easter Farmhouse Decor
As an Amazon Associate, I earn from qualifying purchases. I also may earn from other qualifying purchases with other companies or get free product to review and use. All opinions are my own.
- Book Pages
- Scissors
- Plastic Eggs
- Glue
- Paintbrush
- Twine String
- Flower Beads
- Decorated Easter Bucket
- Shredded Craft Paper
- Artificial Moss Grass Plant
Cut Book Pages
To start this project, you’ll need to grab an old book that you don’t mind cutting up. You can also use an old newspaper or any other paper you have lying around. The goal is to create small strips of paper that will be used to cover the plastic eggs.
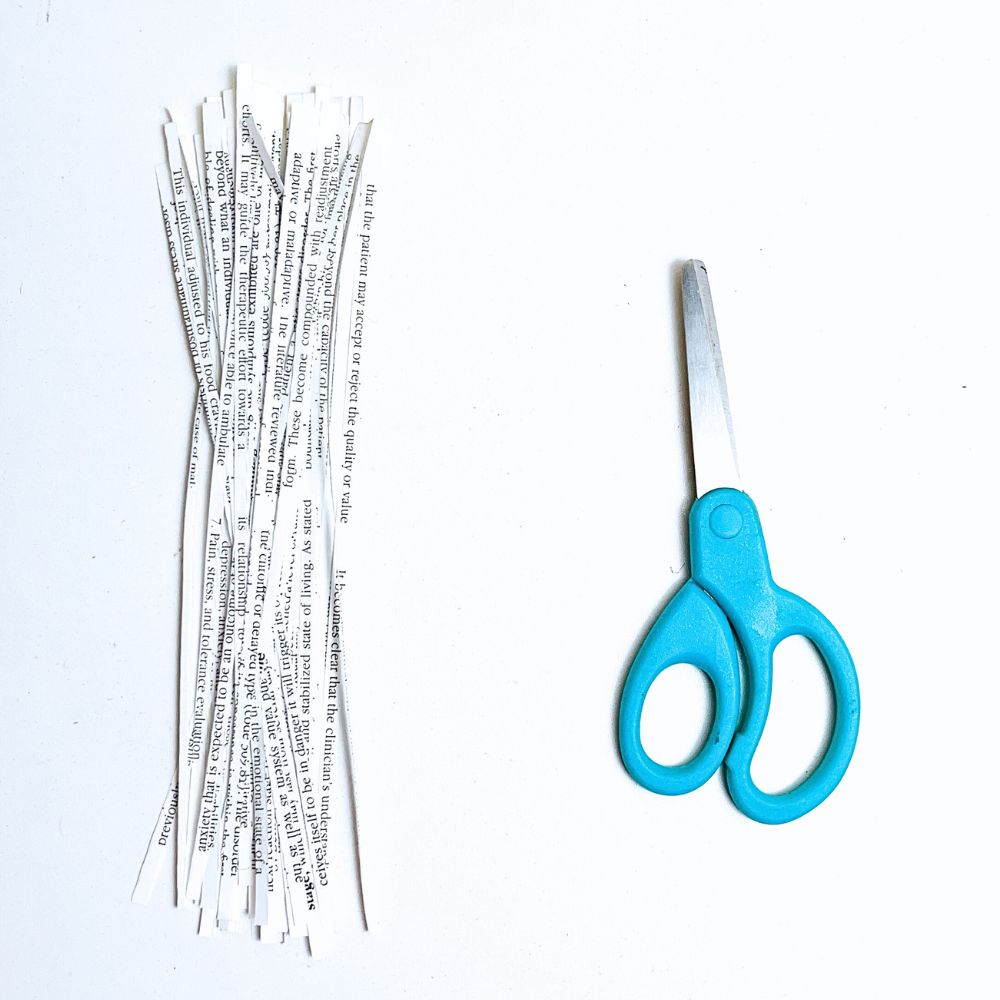
Now get your scissors and start cutting! Don’t worry too much about making perfectly even cuts, as this DIY project is meant to have a rustic and homemade look. You can even tear the paper by hand for a more natural appearance.
If you want a more vintage look, you can use aged paper like parchment paper or coffee stained paper from old books. This will add an extra layer of texture and charm to your Easter farmhouse decor. Here’s a DIY farmhouse Easter craft you can also add to your home decor.
Glue Pages to Eggs
Now get your glue and start sticking those paper strips onto the eggs. To apply glue thinly and evenly, use a paintbrush to spread it on the egg’s surface.

Don’t be afraid to get creative with your paper placement! Overlap, crinkle or layer the strips in different directions for a unique, collage effect. Remember, there’s no right or wrong way to do it.
Smooth out any wrinkles or air bubbles with your fingers or the paintbrush as you go along. You still want a neat and clean finish for your decorated eggs even if you’re going for a rustic farmhouse look.
Cover as many eggs as you’d like, and you can also add more layers of paper for a thicker and more textured look. Don’t forget to let the glue dry completely before moving on to the next step.
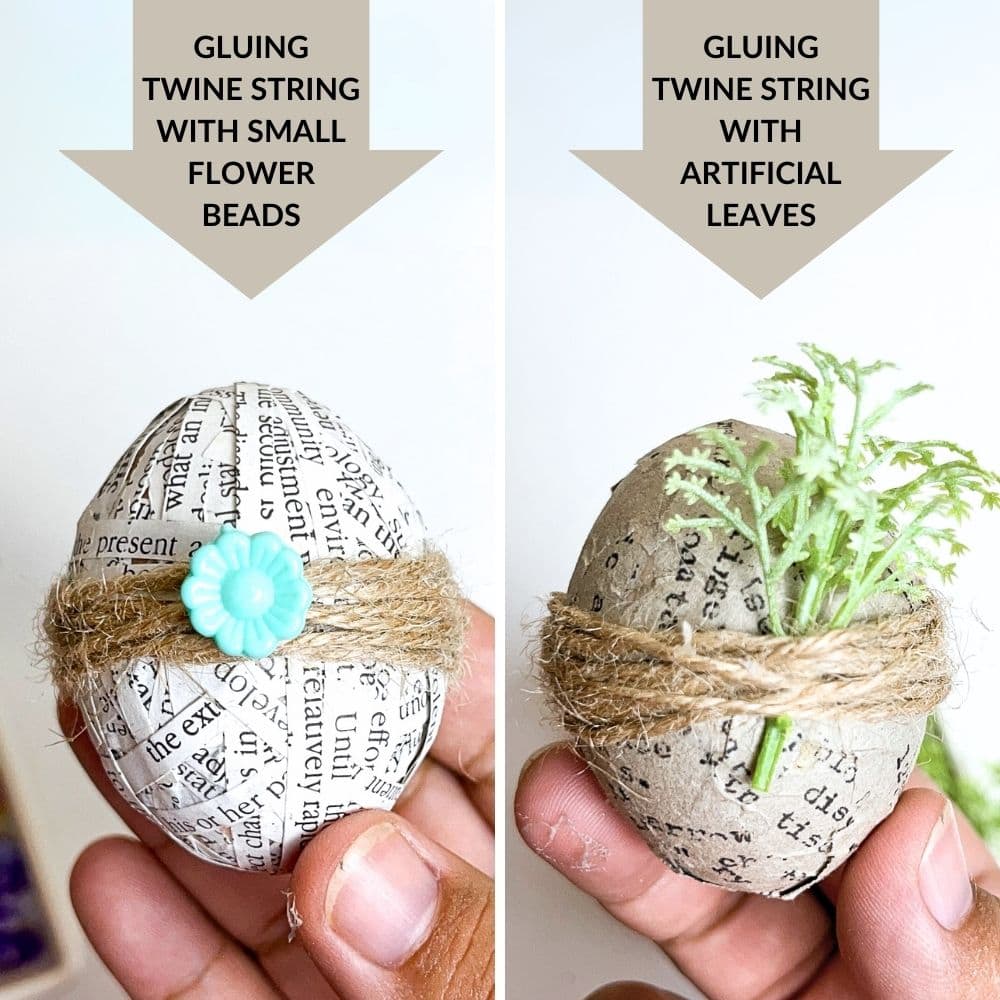
Decorate Eggs
It’s time to add some personality to your farmhouse-inspired Easter eggs! You can unleash your creative side and have fun decorating each egg with different designs, patterns, and colors.
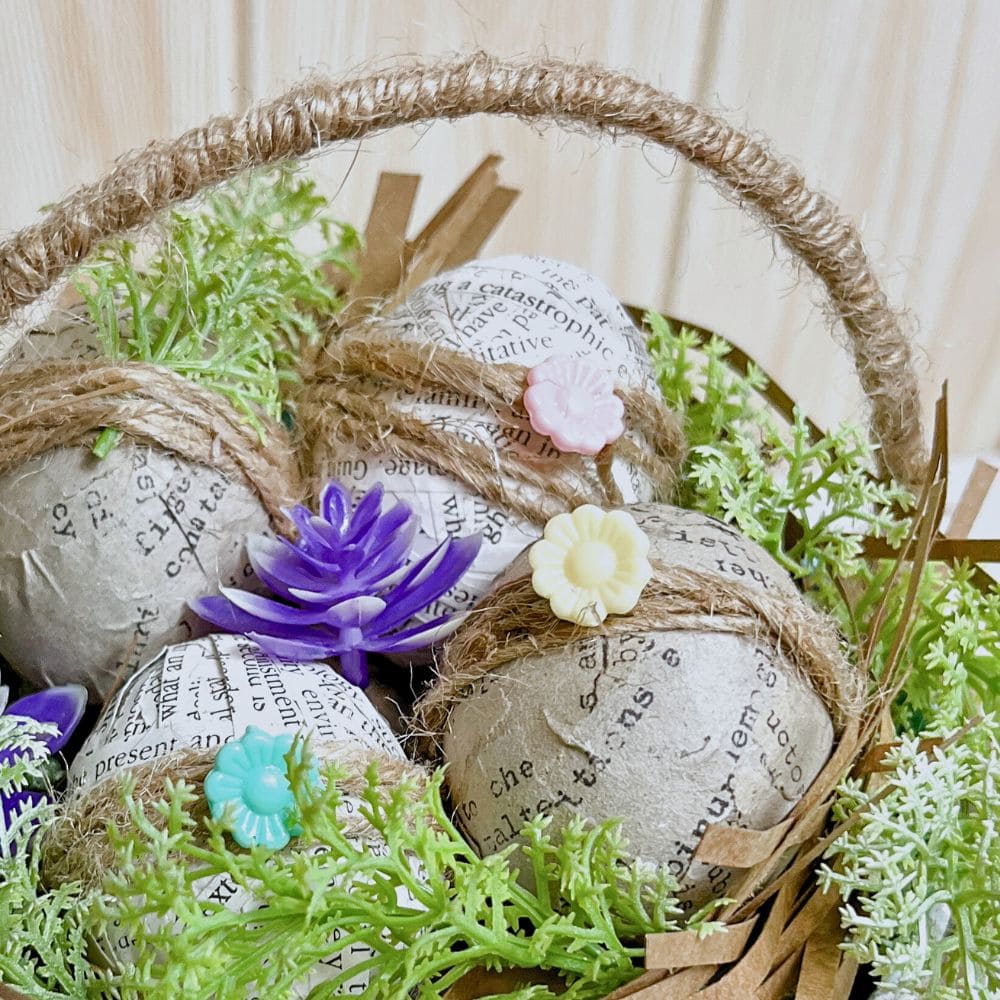
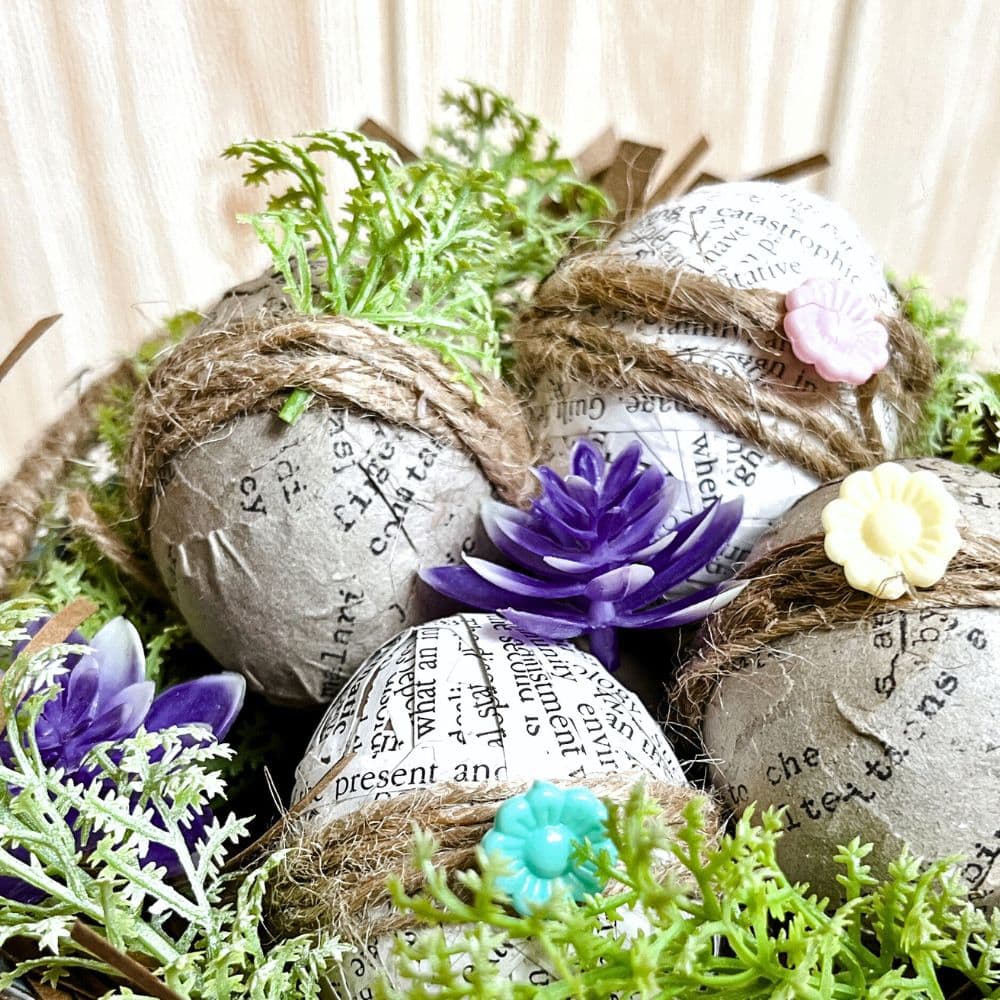
After the glue dries on your paper wrapped Easter eggs, you can wrap twine string around them to add another layer of rustic charm. You can also glue small flower beads or artificial leaves onto the eggs.
There are many ways to decorate the eggs, and you can use any supplies you have on hand. You can also try adding stickers, ribbons, or even paint them as colorfully or as simply as you’d like. So get creative and make them your own!
Assemble Decorated Eggs
Now it’s time to bring all the elements together and assemble your decorated eggs!
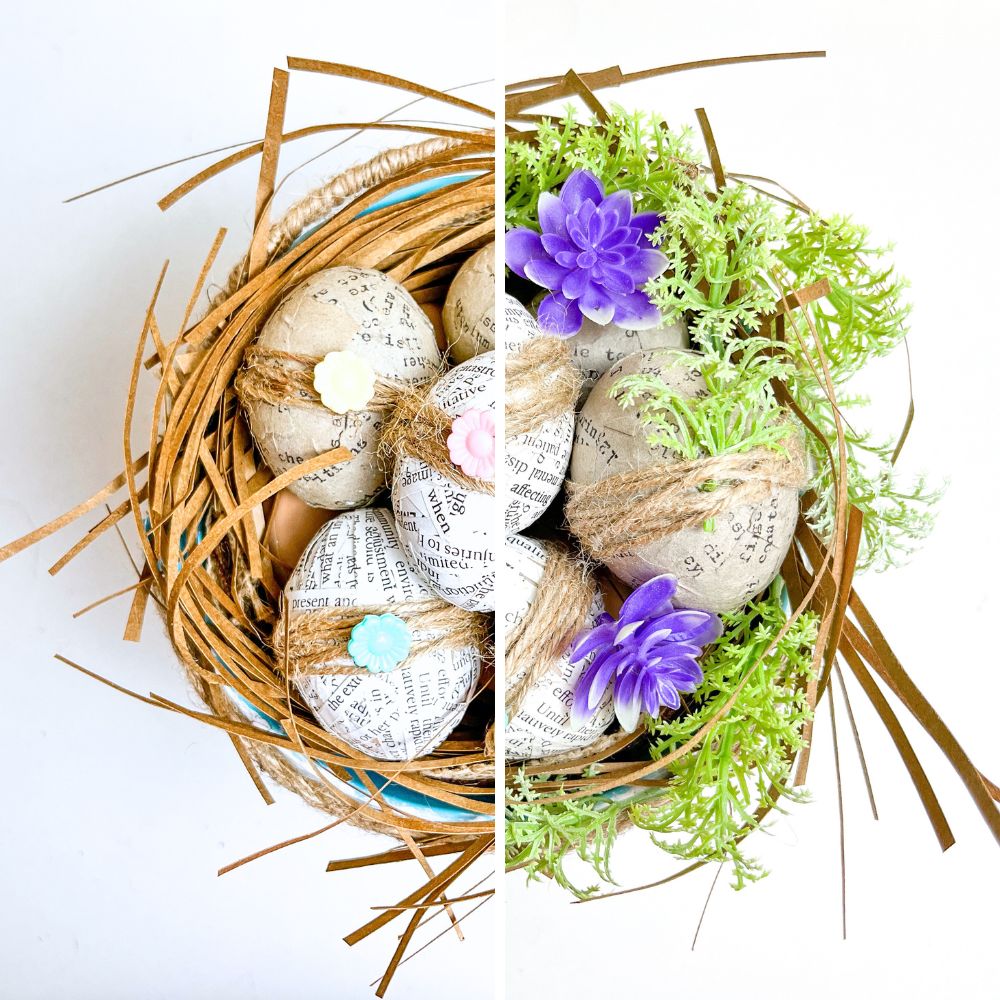
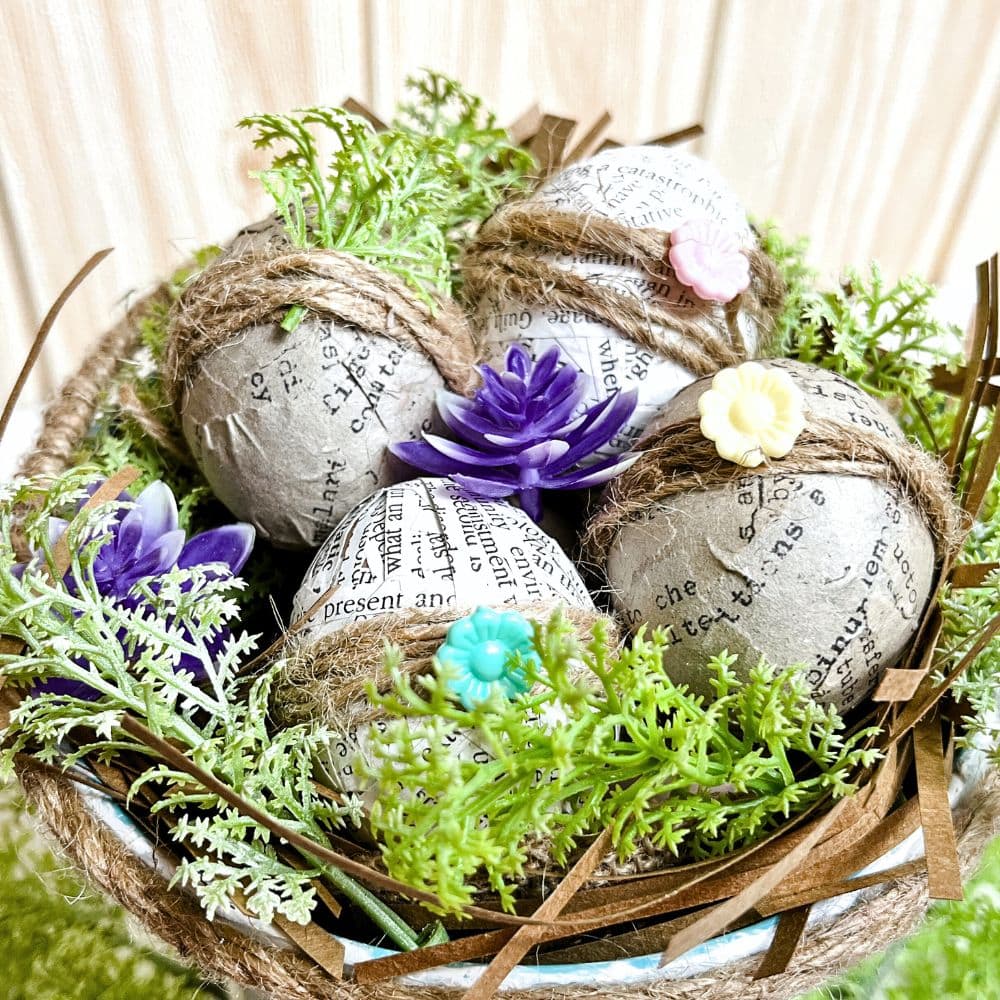
Create a cozy nest of shredded craft paper and arrange some undecorated eggs at the bottom of an Easter bucket, resembling a real bird’s nest. Then add in your decorated eggs on top, overlapping them or spreading them out as you like.
Would you like to save this?
You can tuck in more artificial plant leaves or flowers around the eggs. This will give your Easter farmhouse decoration a fresh, natural feel. You can also add some fun touches like small bunny figurines or Easter-themed trinkets to the display.
Once everything is in place, take a step back and admire your charming Easter farmhouse decor! You can use it as a centerpiece for your dining table or display it on a mantel or shelf. For more fun and affordable Easter craft ideas, check out these DIY Dollar Tree Easter crafts.
Want to add a touch of spring to your living space, here’s our list of spring day decoration ideas and DIY spring decor. And for more budget friendly spring decor ideas, here are DIY Dollar Tree spring crafts.
Display Tips for Your Easter Farmhouse Decor
Now that you have completed your DIY Easter farmhouse decor, it’s time to proudly display it in your home! Here are a few tips to show off your creation and make it stand out.
First, consider the location of where you want to put your decor. A dining table, mantel, or entryway are all great options. Make sure the space has enough room for your display and doesn’t feel overcrowded.
Next, try incorporating other farmhouse elements into your decor display. This can include burlap or linen table runners, wooden accents, and fresh flowers or greenery, to tie in with the farmhouse theme. This will create a cohesive look and enhance the charm of your decor.
Can I use real eggs instead of plastic ones?
Yes, you can definitely use real eggs for this project! If you’re using real eggs, be sure to handle them with care as they are more fragile than plastic ones. Or you can boil the eggs beforehand to make them sturdier for decorating.
However, keep in mind that they may not last as long as plastic eggs, so it’s a good idea to make them closer to Easter day.
But if you plan on keeping your DIY Easter farmhouse decor for more than a few days, it’s really best to use plastic eggs. Real eggs will spoil and start to smell over time. So we suggest using plastic eggs for a longer lasting decoration.
And there you have it, a simple and charming DIY farmhouse decor that will add a touch of whimsy to your home. We hope you enjoyed this project and had fun getting creative with your Easter eggs. Proudly display your creation and share it with friends and family!

DIY Easter Farmhouse Decor
This charming DIY Easter farmhouse decor project features eggs in a bucket decorated and assembled in a rustic manner for your cozy home.
Materials
- Book Pages
- Plastic Eggs
- Glue
- Twine String
- Flower Beads
- Decorated Easter Bucket
- Shredded Craft Paper
- Artificial Moss Grass Plant
Instructions
- Grab an old book, scissors, glue, twine string, flower beads, and any other decorations you want to use for this project.
- Start cutting strips of paper from your old book. Don't worry about making perfect cuts - the more rustic and homemade it looks, the better. You can even tear the paper by hand for a natural, textured look.
- Apply glue to the eggs thinly and evenly with a paintbrush and start sticking the paper strips on the eggs. Get creative with your placement and add layers for a unique collage effect.
- Once the glue is dry, it's time to decorate your eggs! Wrap twine string, add flower beads or artificial leaves, and use any other supplies you have on hand to make each egg unique.
- Assemble your decorated eggs by creating a cozy nest of shredded craft paper and arranging them inside an Easter bucket or basket. Add in fun touches like bunny figurines or Easter trinkets to complete the look.
- Display your DIY Easter farmhouse decor in a prominent place in your home, such as the dining table or mantel. Don't forget to incorporate other farmhouse elements like burlap, wood accents, and fresh flowers for a cohesive look.
Recommended Products
As an Amazon Associate and member of other affiliate programs, I earn from qualifying purchases.


More Easter Decor Ideas
- Farmhouse Easter Decor Ideas
- Easter Metal Buckets
- DIY Easter Sign
- DIY Easter Decorations from Dollar Tree
- Dollar Tree Easter Carrot Ideas

Follow us on YouTube to get more tips for painting furniture. Or share your project with us on our Facebook Group and be part of our community. See you there!