DIY Farmhouse Easter Craft
It’s time to think of Easter decor ideas to bring a touch of springtime cheer to your home. So here’s a fun DIY farmhouse Easter craft you can try yourself or with your family! It has lots of rustic charm and whimsical appeal, perfect for your farmhouse home.
It’s super easy and budget-friendly – what more could you ask for? Create this Easter craft and decorate your home with an adorable sign!
Let’s face it, decorating can be expensive. But with DIY crafts, you can create beautiful decor without spending a fortune. You also get to customize your decorations to fit your personal style and home.

The great thing about DIY crafts is that anyone can do them. You don’t need to be an expert crafter or artist to create decor for your home. All it takes is a little bit of creativity, some basic supplies, and a willingness to try something new.
Plus, DIY crafts are a great way to spend quality time with your family or friends. You can turn it into a fun bonding activity while creating something together, especially this Easter!
Now let’s get started on how to make this DIY farmhouse Easter craft.
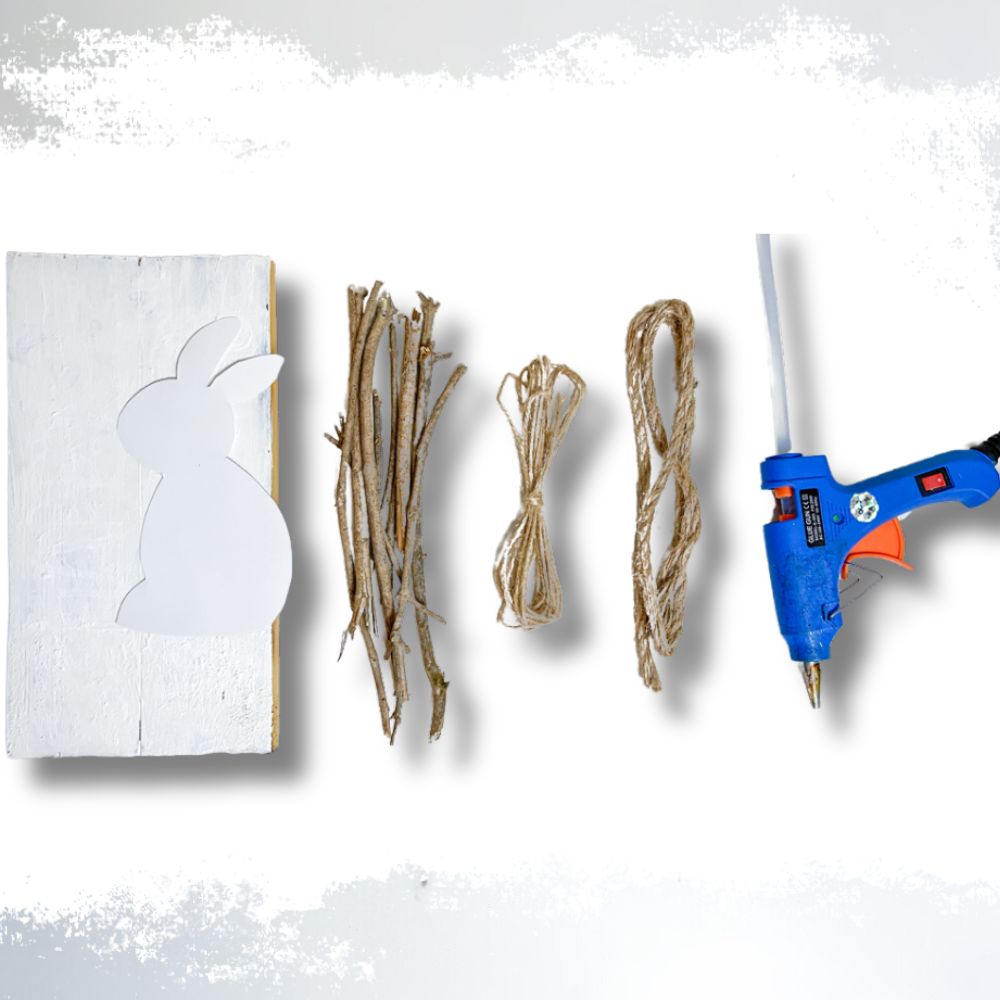
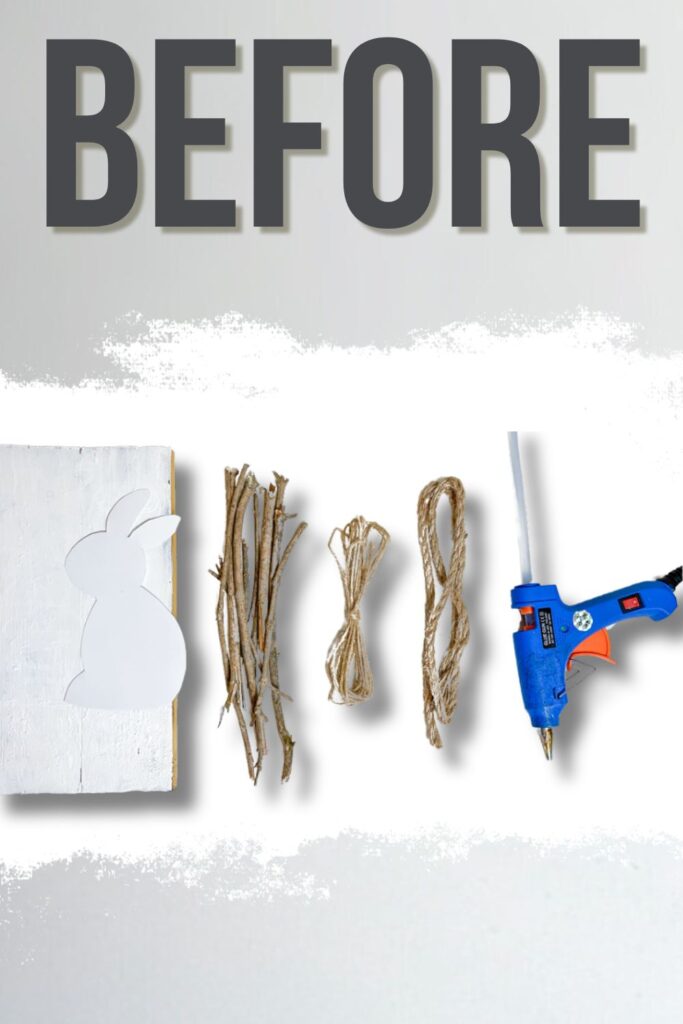
Supplies Used for DIY Farmhouse Easter Craft
As an Amazon Associate, I earn from qualifying purchases. I also may earn from other qualifying purchases with other companies or get free product to review and use. All opinions are my own.
- Paper
- Pencil
- Scissors
- Cutter
- Dried Twigs or Branches
- Glue Gun
- Twine Strings
- Scrap Wood Planks (ideally 3/4 in x 8 in x 1 ft)
- Optional: Artificial Leaves and Flowers
Cut Paper into Bunny Shape
Let’s start by cutting out a bunny shape from paper. This will be the main element of our Easter sign. You can choose to make a big or small bunny, depending on your preference.
Draw the bunny shape on the paper using a pencil first if you’re not confident in cutting freehand. You can also look for templates online and trace them onto the paper. Once you have your bunny shape, carefully cut it out with scissors.
If you’re making this DIY craft with kids, make sure to supervise them while using scissors. You can also have them draw the bunny shape and you cut it out for them. This will make the activity safer and more enjoyable for everyone.
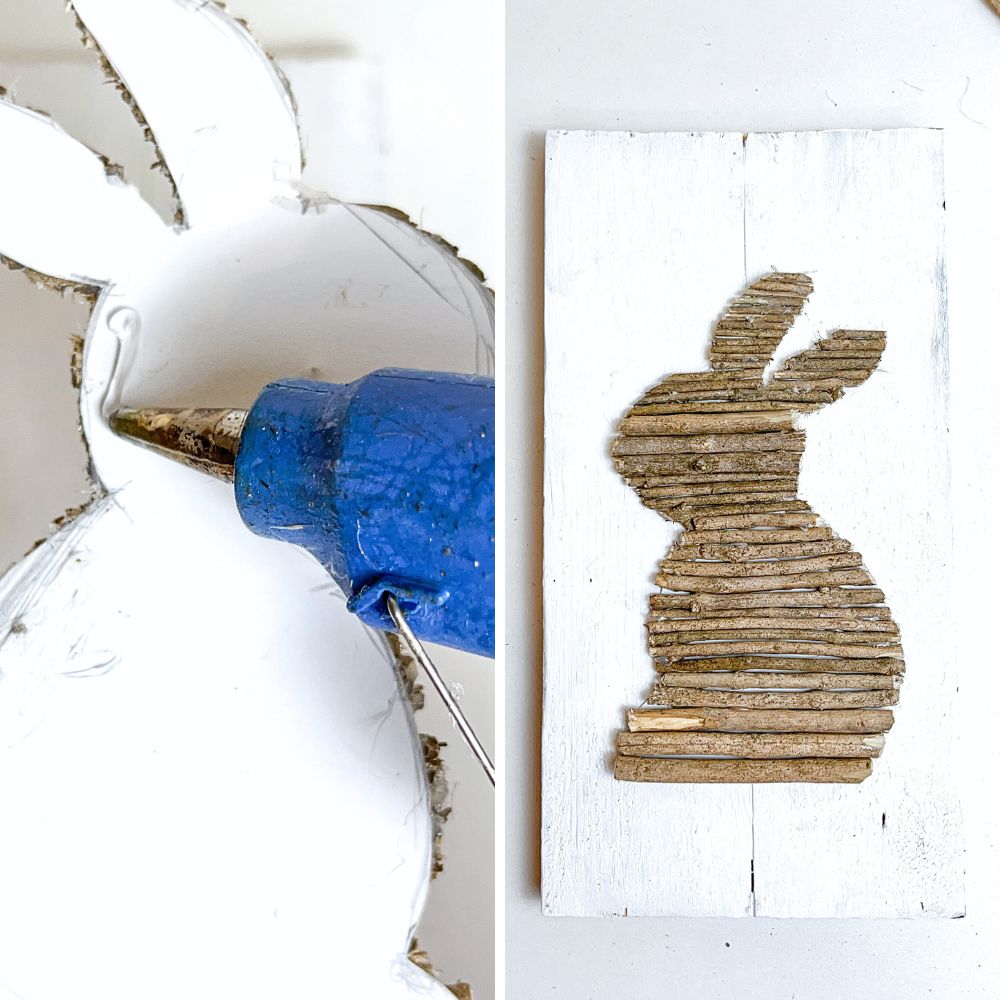
Glue Twigs onto Bunny Shaped Paper
Now it’s time to glue the twigs onto the bunny-shaped paper! Start by placing a small amount of hot glue on one end of the twig, and carefully pressing it onto the paper. Continue adding twigs in this manner until the entire bunny shape is covered.
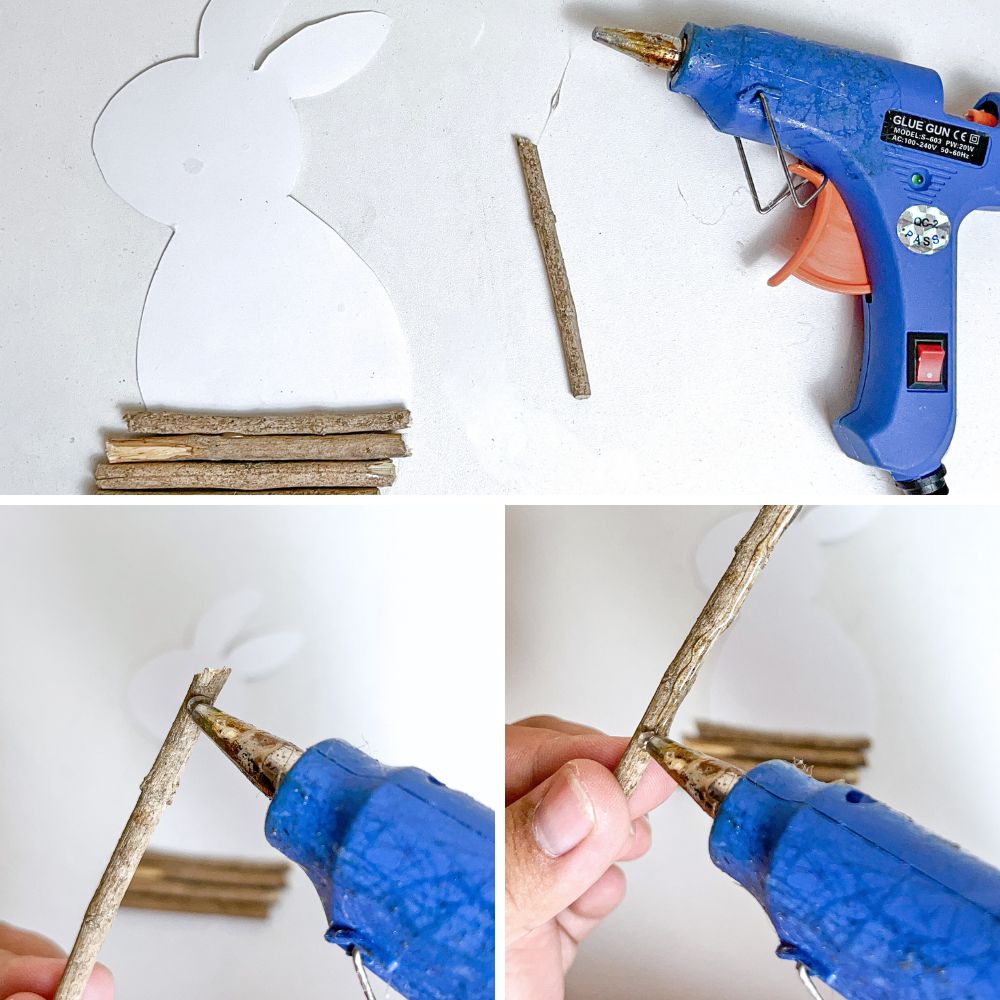
Remember to always be cautious when using a hot glue gun – it can get very hot! Make sure to handle it carefully and keep it away from children.
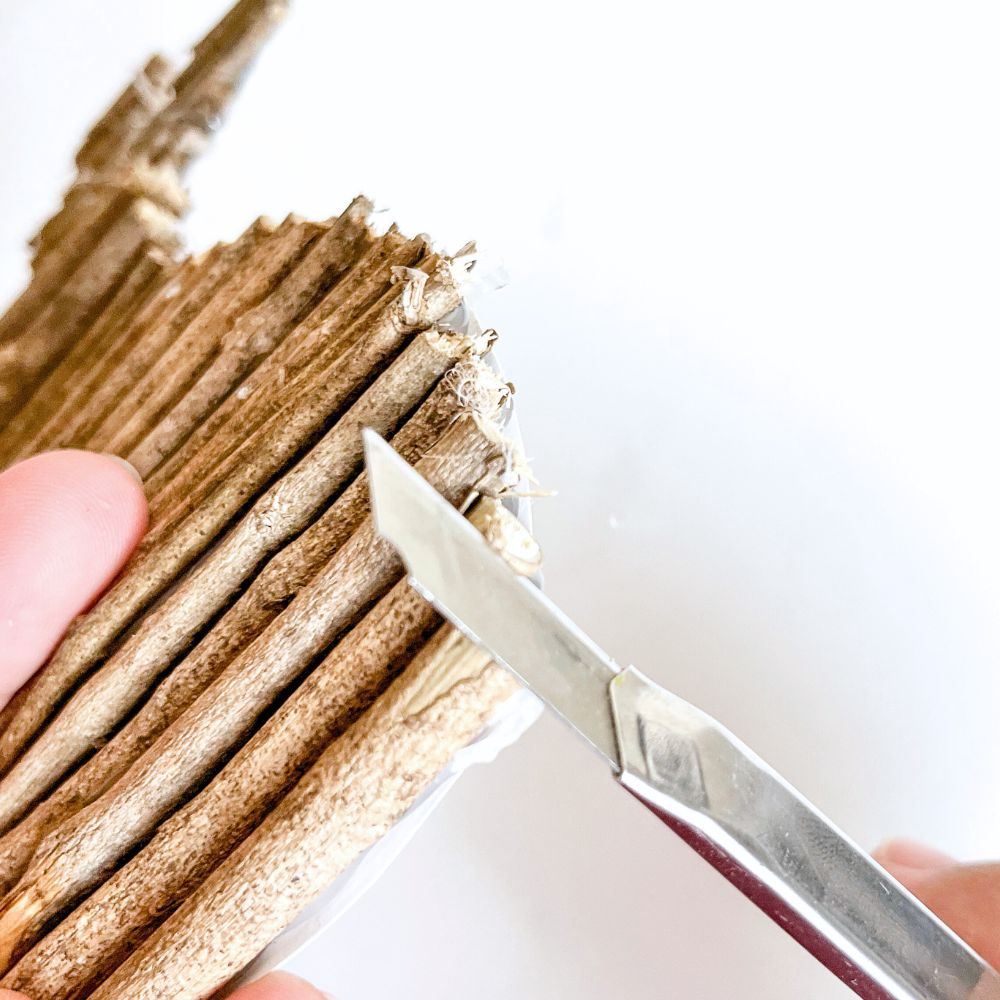
Once you’ve glued on all the twigs, give them some time to cool and harden completely. You want to make sure that they are securely attached to the paper and won’t fall off later on. While waiting, you can also trim any excess twig edges for a neater appearance.
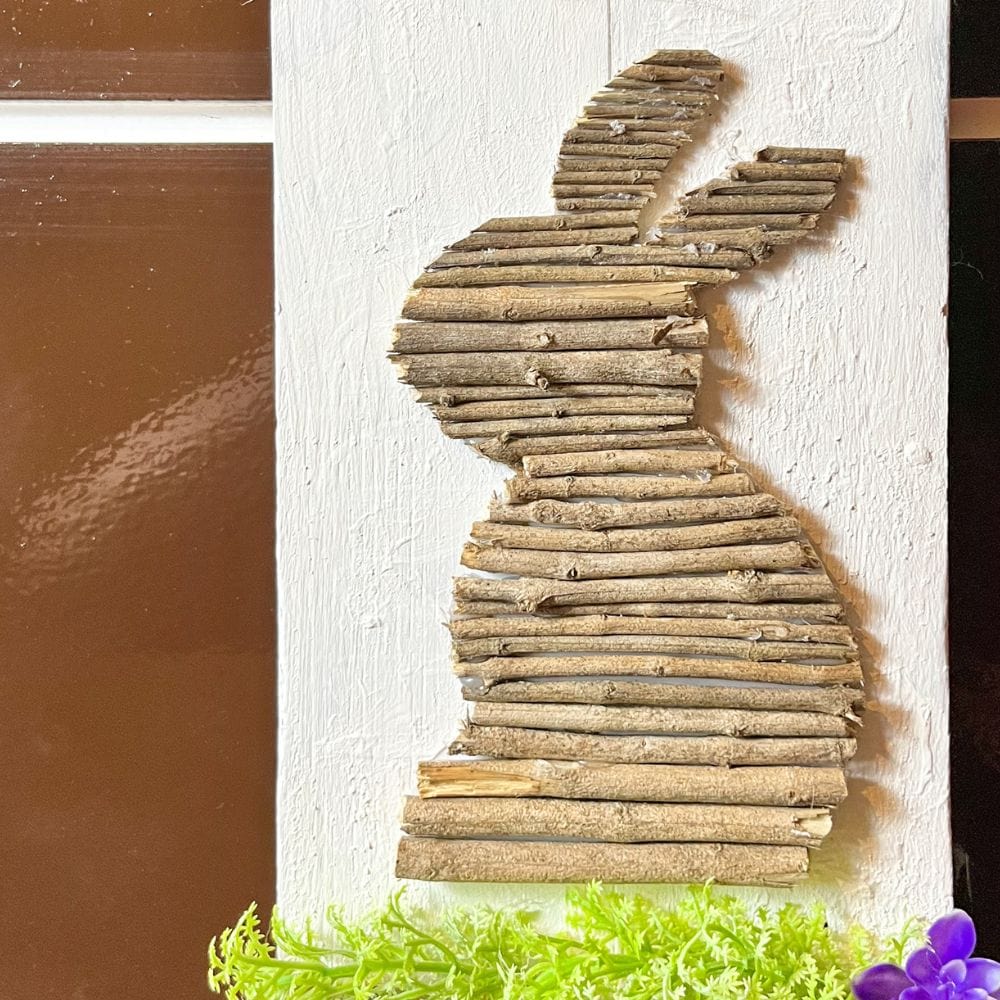
Attach Bunny to Wood
Now that we have our adorable bunny made, it’s time to attach it to the wood and turn it into a proper sign. Place the bunny on top of the wood and adjust it to your desired position.
Once you’re satisfied, use hot glue to secure it onto the wood. Make sure to spread the glue evenly for a strong hold.
You can paint the wood plank beforehand or leave it as is for a more rustic look. We painted it white to make the bunny stand out more. You can also add some distressing or texture to the wood for a more farmhouse feel.
Would you like to save this?
Decorate Easter Bunny Craft
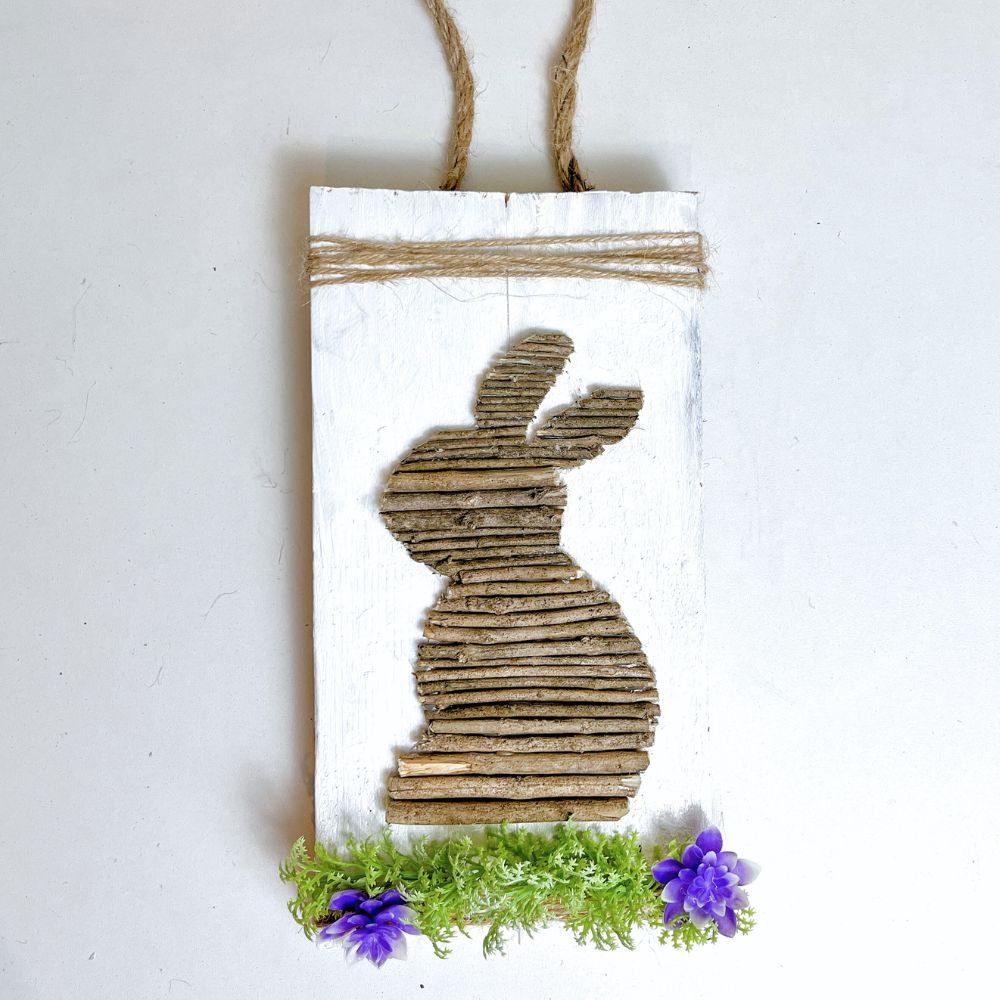
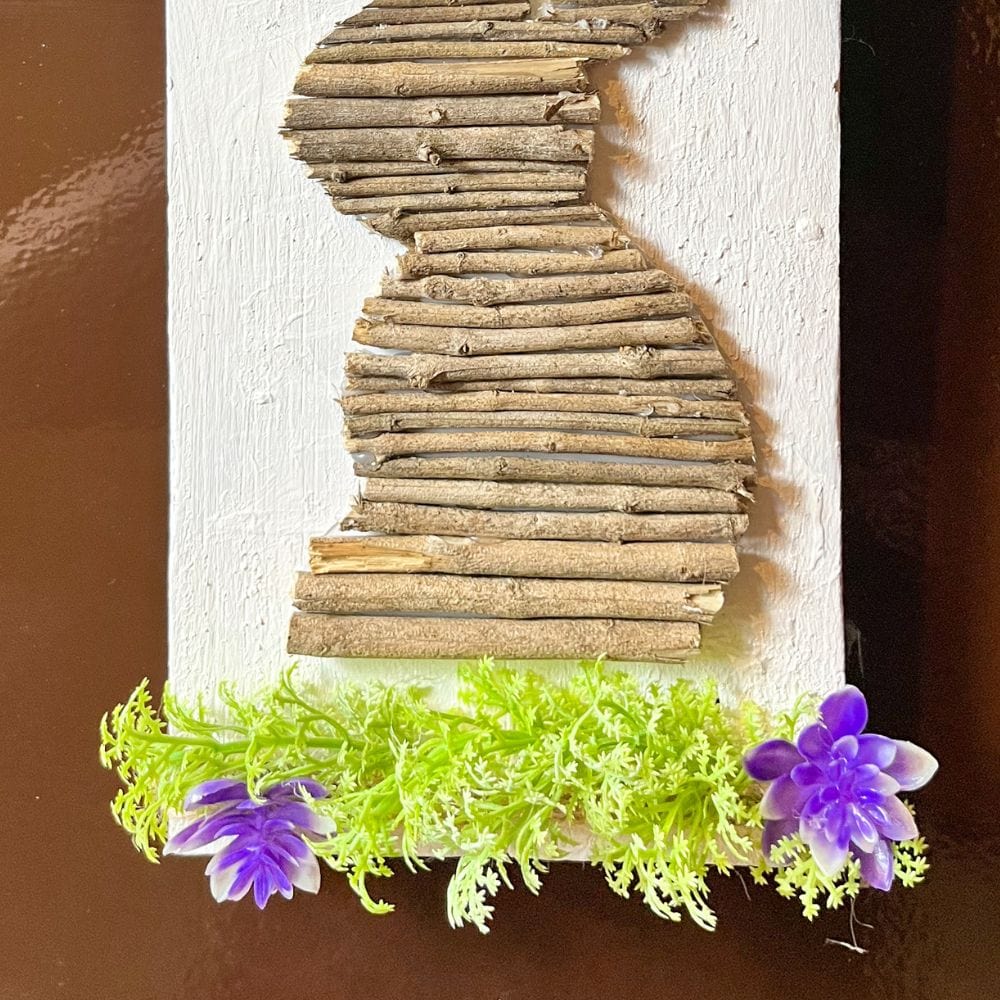
To add a rustic touch, we’ll be using twine strings to decorate our bunny sign. Simply wrap some twine around the top and bottom of the wood plank.
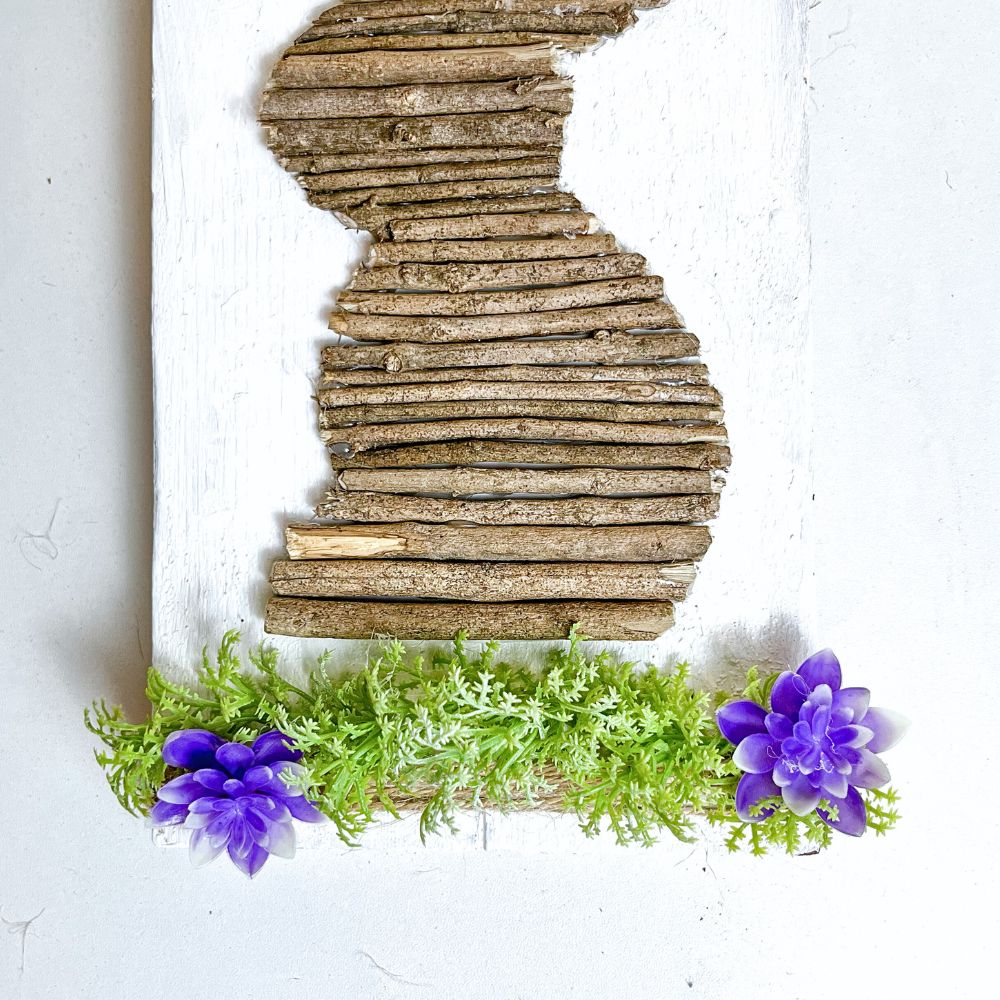
Then add some artificial flowers and leaves to give it a more spring inspired look. You can even go for real leaves and flowers if you’ve got them handy!
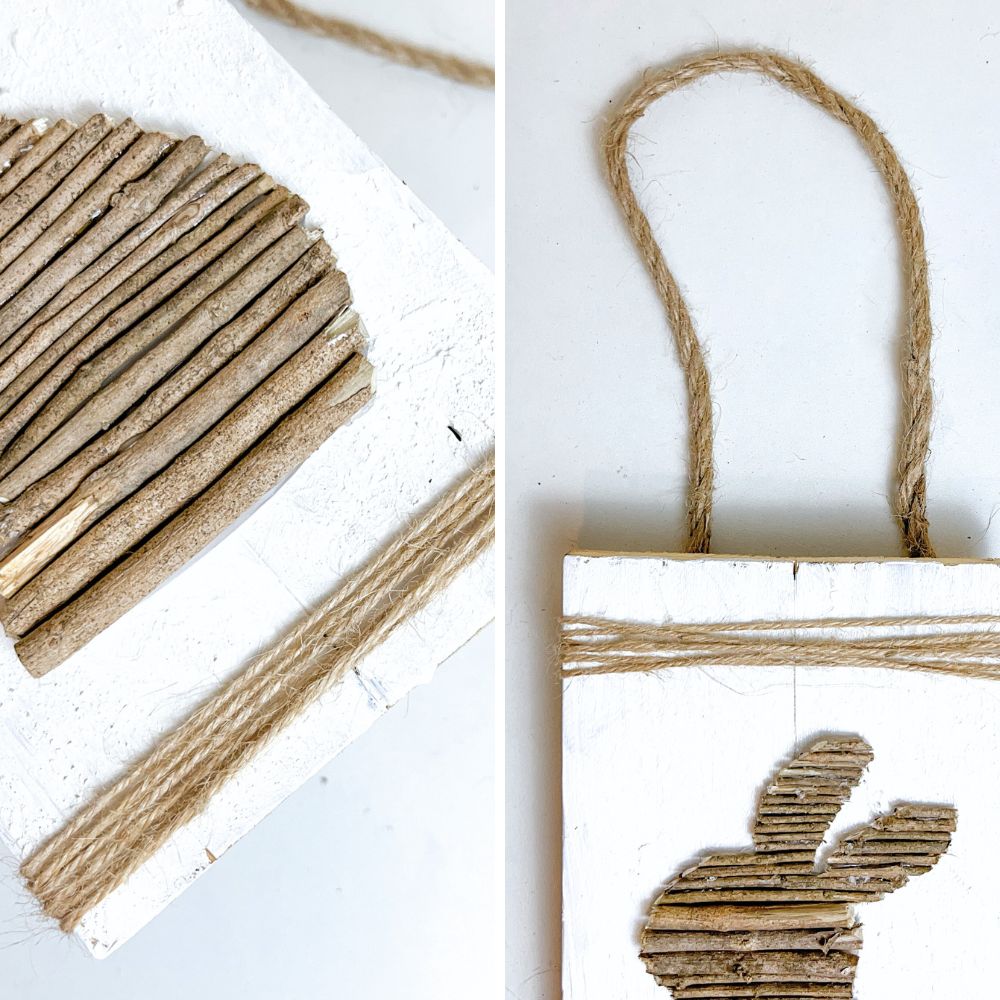
To hang your Easter craft, we’ll be using a thicker twine rope. This will not only add another layer of charm but also make it easier to hang on your door or wall. Glue it on the back side of the wood plank and make sure it’s secure. You can also tie a bow with the twine for an extra cute touch.
If you want to add a personal touch, you can paint or write a message on the wood plank. This could be anything from “Happy Easter” to a family name or even a cute Easter pun. Make this DIY Easter craft yours by incorporating your own style.
And that’s it, your farmhouse style Easter decoration is complete! Hang it up on a door, wall, or mantle and enjoy the springtime vibes in your home. For more farmhouse theme decor, check out our list of farmhouse Easter decor ideas and this DIY farmhouse Easter decor!
Looking for farmhouse decor for spring, here’s our list of DIY farmhouse spring decor. Or want to create a handmade spring decor that will add charm to your home, check out these DIY spring crafts for adults. For more budget friendly spring decor, we have DIY Dollar Tree spring crafts here!
Can I personalize the bunny shape with my own design?
You sure can! Since it’s Easter, we went for the bunny shape, but feel free to get creative and come up with your own design. You can try different shapes like eggs or flowers, or even draw a unique bunny face. As long as you can cut it out of paper, anything is possible!
And again, there are plenty of bunny templates available online that you can print out and use as a guide. Simply trace the template onto the paper, cut it out, and you’re good to go. This way, you can still personalize your design without worrying about messing up the shape.
Just keep in mind that the size of your design should also fit well on the wood plank you’ll be using. Otherwise, you might need to resize it or use a bigger plank. It’s all up to you and your preferences. Have fun with it!
So give this DIY farmhouse Easter craft a try! Involve your loved ones for some bonding time, and maybe even make it a new tradition. You can even make it a little competition and see who comes up with the most creative spring craft.
Let’s spread some Easter cheer – one cute sign at a time! For spring touches to your living space, here are spring day decoration ideas!

DIY Farmhouse Easter Craft
Here's a fun DIY farmhouse Easter craft you can try yourself or with your family to add springtime cheer to your home.
Materials
- Paper
- Pencil
- Dried Twigs or Branches
- Twine Strings
- Scrap Wood Planks (ideally 3/4 in x 8 in x 1 ft)
- Optional: Artificial Leaves and Flowers
Instructions
- Cut out a bunny shape from paper using scissors. If you're not confident in cutting freehand, use a pencil to draw the shape or find templates online and trace them onto the paper.
- Carefully glue twigs onto the bunny shaped paper with hot glue, making sure to cover the entire bunny shape. Remember to handle the glue gun with caution and let it cool completely before moving on.
- Position the bunny on a piece of scrap wood plank and secure it with more hot glue. You can paint the wood beforehand for a pop of color or leave it as is for a rustic look.
- Add some farmhouse charm by wrapping twine strings around the top and bottom of the wood plank, and decorating with artificial flowers and leaves. Just be sure to use enough hot glue to keep everything in place.
- Use a thicker twine rope to hang your DIY Easter sign on a door or wall. You can add more personal touches like painting a message or adding your name.
- And voila, your DIY farmhouse Easter craft i complete!
Recommended Products
As an Amazon Associate and member of other affiliate programs, I earn from qualifying purchases.


More Easter Decor Ideas
- Easter Metal Buckets
- Dollar Tree Easter Carrot Ideas
- DIY Floral Easter Eggs
- DIY Easter Decorations from Dollar Tree
- DIY Dollar Tree Easter Crafts

Follow us on YouTube to get more tips for painting furniture. Or share your project with us on our Facebook Group and be part of our community. See you there!