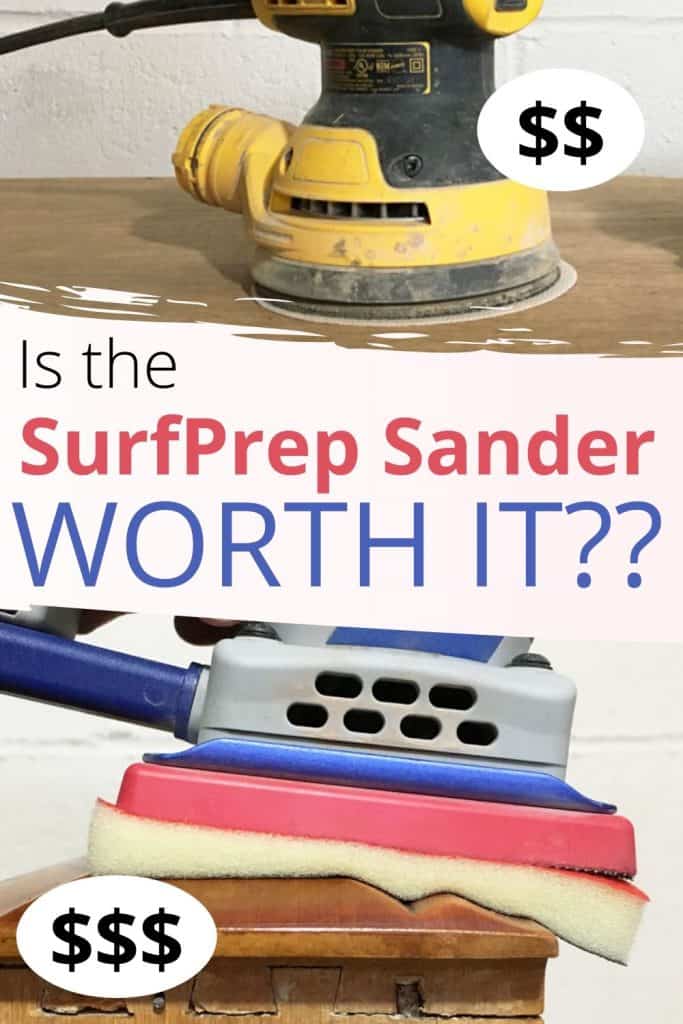
Is a SurfPrep Sander Worth It? The Honest Review
If you’re on the fence about buying a SurfPrep sander, specifically the 3″ x 4″ Electric Ray with Vacuum Compatibility, then I’m here to help! Welcome to the SurfPrep Sander Review! We’re going to dig in to everything you need to know to pick the best sandpaper and tools for your projects.
If you’re always on the lookout for ways to make your woodworking or furniture refinishing more efficient and create that flawless finish, you’re in the right spot. I’ve put in countless hours and a lot of elbow grease testing out various aspects of the SurfPrep Sander line, to bring you a straightforward review.
Whether you’re a seasoned pro thinking about switching to SurfPrep, or a DIYer curious about cutting your sanding time in half, this review’s got firsthand insights, price comparisons, and practical tips to help you make the right call. So here is why I think it is the best electric sander, why I love (and don’t love) the SurfPrep electric sander, and what it can add to your toolbox.
If you’re new here, welcome! I’m Natalie, a furniture painter that loves to turn old trashy furniture into treasure! Why am I telling you this?
Well, to help you understand where I’m coming from, and what I like or don’t like about the SurfPrep sander, you kind of have to know what I use it for. Actually, painting furniture has very little to do with painting, and a lot to do with what happens before, between, and after paint.
It requires a lot of careful preparation to make sure that the piece looks its best when finished. Aside from sanding multiple times for easy project, this includes cleaning, priming, and other steps necessary for the paint to adhere properly to the surface.
Actually, painting furniture has very little to do with actually painting, and a lot to do with what happens before, between, and after paint.
It requires a lot of careful preparation to make sure that the piece looks its best when finished. Aside from sanding, this includes cleaning furniture before painting, priming, and other steps necessary for the paint to adhere properly to the surface.
As an Amazon Associate, I earn from qualifying purchases. I also may earn from other qualifying purchases with other companies or get free product to review and use. All opinions are my own.
Sanding For Paint Prep
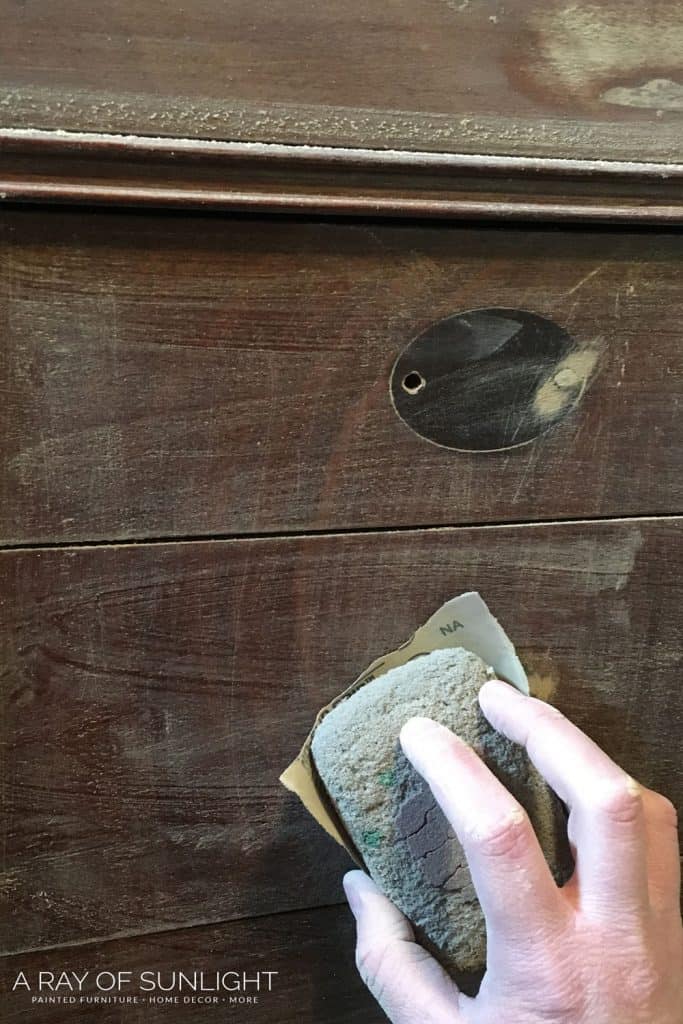
Whether you have a SurfPrep Sander, other orbital sander, or no sander, before you paint furniture or wood projects, you have to sand the surface to make it smooth, and help the paint stick better. Before I purchased the SurfPrep sander, I scuff sand each piece of furniture by hand with 220 grit sandpaper to remove the sheen from the old finish.
If you skip sanding before painting furniture, the paint can peel or scratch off easily. Here’s more information on sanding before painting furniture and its importance in the furniture painting process.
Because regular electric sanders have flat and ridged pads, they easily damage and sand through any raised details or edges. I had to sand A LOT by hand because furniture has a lot of details, grooves and trim. When sanding by hand, here is the best way to sand curved surfaces.
The most common electric sander for beginners is a round orbital sander. Not only does it have a ridged pad, it is a circular shape, which prevents you from getting into corners easily. So any corner has to be sanded by hand as well.
Sanding furniture before painting literally could take hours before I had the SurfPrep Sander and foam sanding pads.
But wait, there’s more. After scuff sanding, there is a coat or two of primer, a couple of coats of paint, and/or a few coats of topcoat. And each product recommends sanding in between coats for the smoothest most durable finish!
Can you see the pattern here? From start to finish, I would spend the most of my time sanding furniture. I should really be called a furniture sander instead of a furniture painter! And remember, almost all of those times, I had to sand by hand. Talk about time consuming!
Honest SurfPrep Sander Review
Let’s dig in to what I really love about my SurfPrep 3″ x 4″ sander, especially its cool vacuum attachment. We’ll check out why it’s so awesome in a simple, straight to the point way. Then, we’ll switch it up and talk about the parts that don’t quite hit the mark, pointing out where it could do better.
Make sure you stick around for the whole ride! But if you want even more information, head over to our SurfPrep Electric Ray 3×4″ Sander post, where we go into more detail about the many features and benefits.
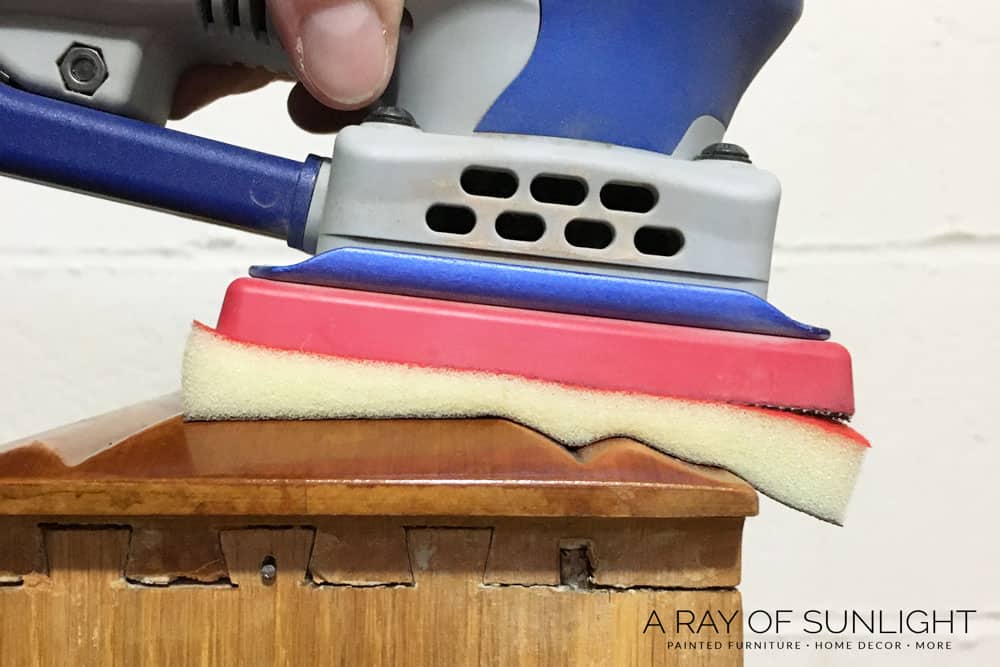
Electric Foam Sander for Sanding Detailed Trim
With the help of the SurfPrep foam pads, I can easily sand trim and details quickly! I can’t say enough about the foam sanding pads! Actually, they are the exactly why I got this sanding kit to begin with, and what helps make this sander the best sander for paint prep.
The 1/2″ foam pads are amazingly flexible and allow you to sand curved surfaces, and go over trim and details without damaging them. But you can also get into the grooves and details while you’re at it!
I dreaded sanding each piece of furniture by hand. And it’s not just once that I have to sand each piece. I sand each piece of furniture at least 3 times. At least! But now I can thoroughly sand a piece of furniture within a couple of minutes. Compared to taking 10-15 minutes to sand it.
Update: SurfPrep Sanding has since come out with foam sanding pads for other brand sanders!! So, you don’t have to purchase the SurfPrep sander just for the foam pads. Head over to their shop and choose from mouse sander foam pads, orbital sander foam pads, and even Festool foam pads!
Best Sander with Vacuum Attachment
Before I bought the SurfPrep, I had this cheap round Dewalt orbital sander. It has a little bag on it to catch the dust, but let’s be honest. That little bag doesn’t really do much, does it? So I bought a little vacuum attachment for it.
Well, it wasn’t the right attachment, or I needed another part. Something wasn’t right about it, so I had to hold the hose to my shop vac onto the end of the sander. Yeah, I should have researched more and figured out what part I really needed. But Dewalt wasn’t clear on what part you needed, and I just plain got so confused that I gave up.
SurfPrep sanding makes connecting a vacuum to their sander so EASY!
For my sander vacuum system, I have this RIDGID shop vac (with the orange hose) with 6 horsepower, and a large capacity. On the end of the orange hose, I have the SurfPrep flex hose, which is a must buy so you don’t have to struggle with a stiff hose!
The orange Ridgid vacuum hose and the SurfPrep flex hose are connected with the 1″ – 1.25″ hose connector. The other end of the flex hose just twists into the SurfPrep vacuum port. Remember to twist the hose into the SurfPrep sander backwards, as it is reverse threaded.
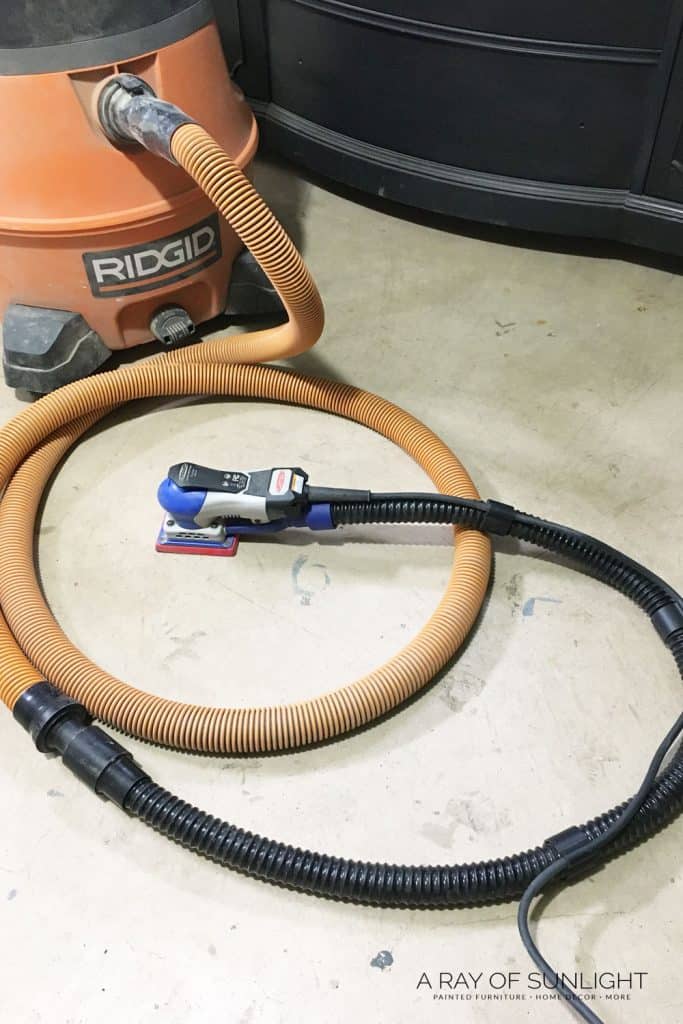
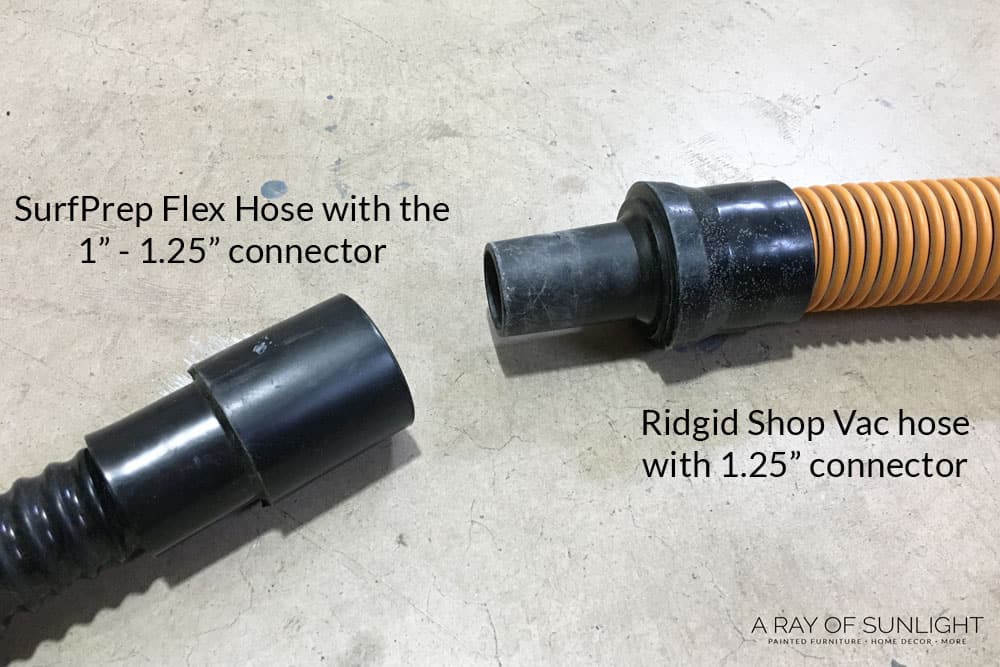
And whenever I need to use my vacuum hose to actually vacuum something up, I simply slide the flex hose off. I can also attach the brush attachment to the end of the orange hose to help vacuum up dust. It’s so easy to switch between the sander and the brush with this setup!
Since the time of writing this post, SurfPrep came out with their own dust collection system. Jump over to our SurfPrep vacuum
POV-8 review to learn all about it and if it’s the right investment for you, compared to using a shop vac.
Does the shop vac make the SurfPrep Sander completely dust free? Nope.
From my experience, the dust hasn’t gotten in the air and everything around me dusty. I still get a small amount of dust on the surface that I’m working. But it sucks up MOST of the dust.
When you compare it to scuff sanding by hand though? It picks up so much of the dust!! And when you compare it to the dinky little dust bag on other sanders, the SurfPrep sander with shop vacuum is amazing!
To my knowledge, no sander and dust extractor system will remove all of the dust from sanding. The purpose is to keep the dust out of the air, and remove most of the dust.
Quietest Sander
This is pretty self-explanatory. But really, it’s so much quieter than any other sander I have used! Now if only my shop vac wasn’t so loud, then we would be in business!
There is just a small hum sound when you use this sander without a dust extractor! The new SurfPrep vacuum is very quiet though and it turns on and off with the sander. That is amazing!
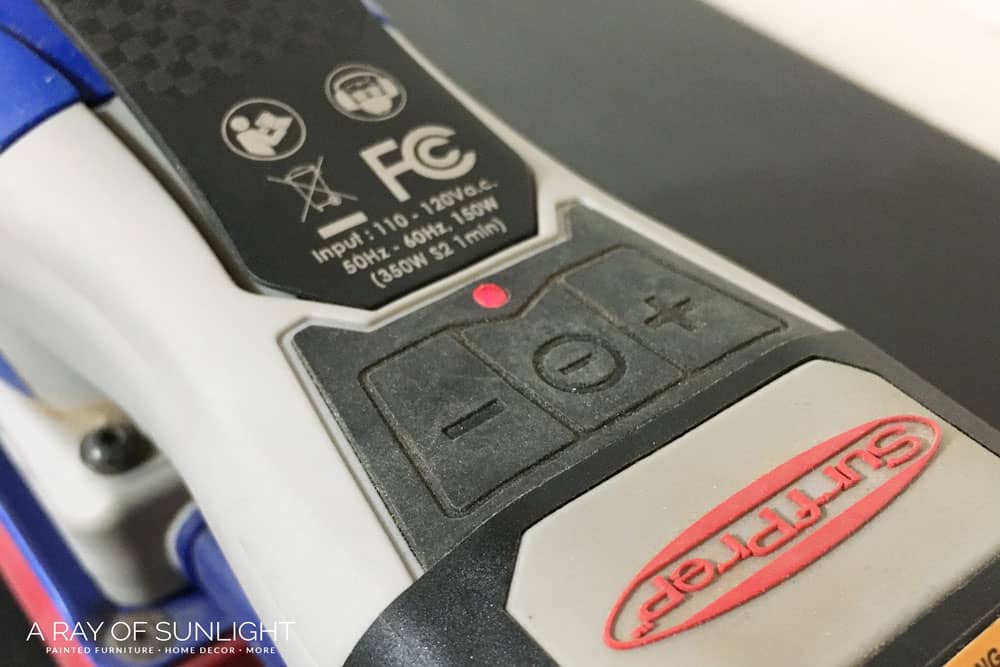
Variable Speed Sander
Honestly, I knew it had different speeds before I bought it, and I didn’t think I would use them.
I was wrong. I find myself turning it to the lowest speed to sand between coats of paint when I don’t want to cut through the paint on the edges. I obviously turn it all the way up when I want to quickly cut through the finish, down to bare wood. I love having the ability to make it faster or slower, and I never knew I would!
Best Ergonomic Electric Sander for Comfortable Use
I also love that it doesn’t wear out your hand like cheap sanders do. The vibrations are very little, which is perfect for those who suffer from carpel tunnel or arthritis! We have heard time and time again from those who use the Surfprep 3×4 sander that this is one of the top benefits!
Don’t get me wrong. It still has a lot of power, but your hand and arm don’t go numb because of it!
Can your hand and arm still go numb with the SurfPrep? Yeah, of course! If you sand for a few hours straight, I’m sure it would. But are you really going to sand for that long at one time??
It also is comfortable to hold onto. The small built of the sander is easy to wrap your hand around. The only downside here is when it is attached to a vacuum hose, the center of balance is off. But that happens with any sander out there.
But seriously. It’s so much more enjoyable to sand for a long time with the SurfPrep than a cheap orbital sander.
Downsides of the SurfPrep Sander
Now, if you’re on the hunt for reasons to critique the SurfPrep sander, let me share a few aspects that didn’t impress me much. Because with everything, there are always pros and cons. We just have to decide if the benefits outweigh the few cons.
SurfPrep Sander Price
Well, let’s just talk about the elephant in the room. How much does SurfPrep cost?? I had a hard hard time swallowing the price of this sander. Especially when I didn’t KNOW if it would be worth it. I thought it might be worth it, but I didn’t really know.
Looking back, I’m so glad I bought it, but that price tag was a tough one to swallow especially for a very small furniture makeover business. On par with about everything else these days, it’s not cheap!
If you purchase the Pro Sanding System Kit, the 3×4″ electric ray vacuum compatible sander costs around $700. This also includes a great assortment of their foam pads and film sheets, as well as a few other bonuses. The sander alone is about $600.
Even though it was a hard investment for me to make, I am so glad I did it! I save a lot of time using this sander instead of sanding by hand. The small shape makes it easy to sand in tight places and corners. Time is money, and with how often you have to sand when working on furniture or other wood projects, in the end, it’s a no brainer that the investment is worth it.
If you don’t sand a lot for your work, then I personally would look into the SurfPrep Sander Alternative. It’s much more cost effective and it will get the job done for a few projects here and there.
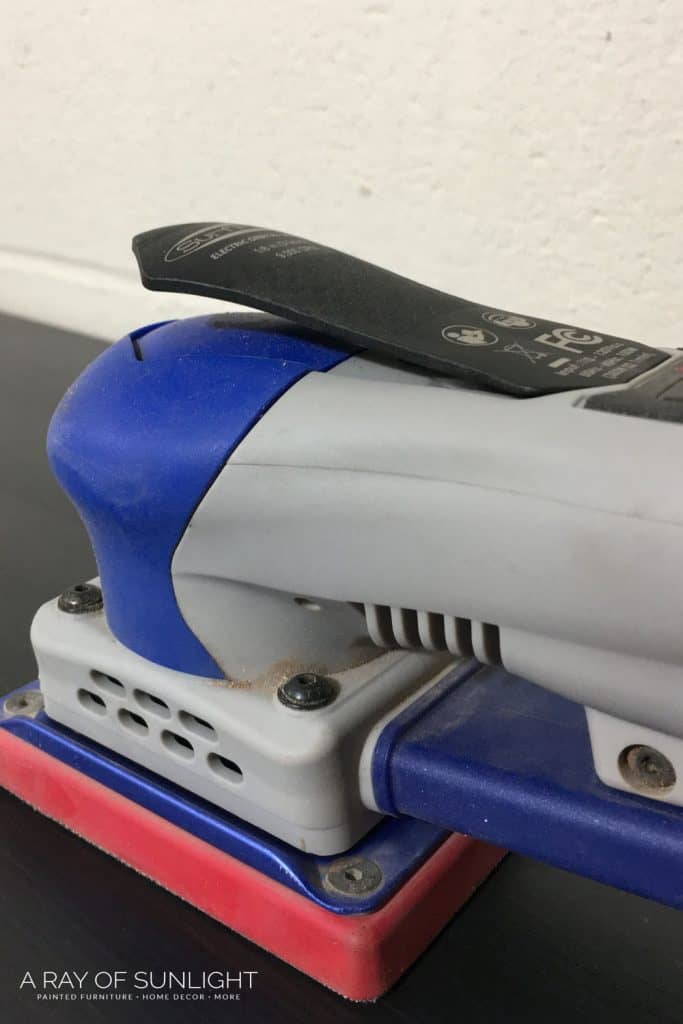
Placement of the On/Off Trigger
This might be a little picky, and maybe I just haven’t gotten used to it yet. But I’m not the biggest fan of having to hold in the trigger on top to make it turn on. Sometimes I like to hold my sander on the side a bit, and that’s just not possible now with the trigger on the top. I’m sure that once I use it more, I will love that it’s on top, or at least get used to it.
Update: I have gotten used to having the trigger, and actually when I use a sander that doesn’t have the trigger, I miss how easy it is to turn the sander on and off. You don’t have to think about it. If I quickly want to set down the sander, it automatically turns off and I don’t have to flip the switch.
So, when it comes down to it, there are pros and cons for each type of on/off switch for sanders.
SurfPrep Abrasives/ Sandpaper Review
At first I was bummed about how long the film abrasives last. I had heard so many good things about their abrasives lasting such a long time. I kept thinking that maybe I’m spoiled, or maybe I’m doing something wrong.
Does the grit last a long time? Yes. But is it suuuper longer lasting compared to other quality sandpaper on the market? I don’t think so.
I didn’t feel like they really lasted much longer than my go-to sandpaper that I’ve used for years. (I still want to do a comparison test somehow to compare how long the grittiness actually lasts, but I haven’t yet.)
Then I compared the price of SurfPrep Sandpaper vs Diablo Sanding Discs.
At Home Depot, my favorite orbital sandpaper costs usually $0.31 per sanding disc, and $0.75 per 9″ x 11″ sheet (I usually cut that sheet into 6 pieces for hand sanding). The SurfPrep hook and loop film sheets cost about $0.35 each! (So only $0.04 more than the long-lasting orbital sanding discs that I love with my coupon code RAY10.)
I also LOVE these Diablo SandNet screens. They stay sharper longer than the films and don’t get clogged as much. These ones are $0.60 each. SurfPrep also has SurfPrep sanding screens, and as far as I can tell they are pretty similar in performance.
The SurfPrep sanding screens are about $0.61 each with my coupon code RAY10. And they fit the sander perfectly.
My favorite 1/2″ thick foam pads cost about $1.50 each with my coupon code! Ouch! (But also, time is money, and they save a lot of time for me.) But comparing this price to the other sandpaper I have used is comparing apples to oranges since these are foam and are what save me so.much.time sanding detailed furniture.
After I compared the prices for the long-lasting sandpaper that I have used for years and the SurfPrep film sheets that last just as long, I realized that I was really being picky and snobbish about their sandpaper.
It lasts just as long, and the price is pretty similar when you compare the hook and loop sanding discs to the hook and loop film sheets! You could go either way on the sheets in my opinion and be very happy with the results.
SurfPrep Sander vs Hand Sanding with 3M
I did a test to see how much time I can save by using the SurfPrep instead of sanding by hand like I usually do. I realized how clog resistant the SurfPrep foam pads are compared to my favorite sandpaper!!
Here is a photo to show you. I sanded one half of this buffet with my favorite sandpaper, and the other half with the SurfPrep and foam pads.

Look how much more gunk is on the sandpaper on the left compared to the foam pads on the right!! I hope this helps you in your big decision!
Where to Buy SurfPrep Sander
The best place to purchase your SurfPrep 3″ x 4″ Sander kit is through this link here, and on their website. Why? Because they offer excellent customer service. Yes, I have even had them email me before sending out an order because I ordered the wrong thing, and to double check that I meant to order some foam pads without holes. They have been there to answer my questions as well!
The great people at SurfPrep gave me a coupon code to share with you to get 10% off! Use the code RAY10 at checkout. It works on everything but their vacuums I believe. And yes, they only gave me a code after I wrote this honest review and used their products for years!
Update 11/6/23: I have tried a few more sanders since I wrote this review. Specifically some of the Festool sanders. I have been impressed with them, but to be honest, I still reach for my SurfPrep 3×4 sander before anything else. Learn if the Festool sanders are better for you though in my Festool RTS 400 REQ Sander Review and Festool Rotex 125 Review.
If you are looking for a sander that will sand through paint or old finishes very fast, the Rotex sander is where it is at! But hold on, it’s powerful!
If you are still on the fence about purchasing your own SurfPrep sander, check out
- what happened when we put the SurfPrep sander to the test here
- and what you need to get started with a SurfPrep sander!
- Or check out our SurfPrep vs Festool Sander Reviews
Check out this video I made about my SurfPrep sander.
More Sanding Furniture Resources
- Best Sanders for Furniture
- Best Sanders to Remove Paint
- Honest SurfPrep 5″ Orbital Sander Review
- Best Sandpaper for Furniture Painting
Follow us on YouTube to get more tips for painting furniture.
Or share your project with us on our Facebook Group and be part of our community. See you there!
Thank you so much for this information and the code for 10 percent off. Mine is on it’s way!! Very good information!! Thanks again!!
You showed how clog resistant the paper was in your last pic, but you didn’t mention how much time you actually saved…. what was the time difference?
Hey Eric,
I think the information you’re looking for is in the sister post to this one, here SurfPrep Sander – What happened when we put it to the test?.
Hope that helps!
Why do you like the zibra brushes?
Do you generally put a finish over your milk paint pieces?
I think your videos are very helpful, thank you for being straight forward and through!
I love tha Zibra brushes are really affordable and that they come in different shapes that really help when painting surfaces that aren’t flat like a wall. A flat, regular paint brush has a harder time getting into the details that a lot of furniture has.
As for milk paint, yep I always seal it in some way shape or form. My fav is waterbased poly. But wax is great too!
HI there,
Thank you very much for your review. We recently bought an older house and remodeled it. However, we chose to keep all the wood doors, banister and some wainscoting. The doors have the panelling details with the four squares within them and the staircase/railing has the detail on each spindle. We have tried to pay to get someone to sand them but our painter wouldn’t do it. I’m thinking that this sander would really help if I decided to do the job myself. based on your experience with the flexible pads, would this sander save me a lot of time sanding all this wood. The wood is stained the old golden oak and I am hoping to sand it all and restain a more natural finish that would match our flooring.
Thank you for your help!
Hey Annie!
What a project!
I can’t say for sure unless I saw the detail. If it has a lot of tiny and tight grooves and crevices, the foam pads won’t get deep into them. It works very well on details that are bigger. But in the tight grooves and crevices I usually still hand sand.
Best of luck with your project!
I’m honestly not sure. I only know about the USA. Sorry!
I would contact SurfPrep and ask them. Their customer service is top notch!
Thanks for letting me know! I’ll go get that fixed. Other than Surfprep, my favorite sandpaper is 3m pro, or diablo.
Hello, I am going to purchase my first Sandprep. What package do you suggest I purchase to get started. I have some projects, table, chairs and hutch to start with. Thank you!
I would get the 3×4″ electric ray with vacuum compatibility in the sanding system kit that comes with a variety of foam pads and film sanding sheets. That is enough to get you started. I personally would buy more medium and fine 1/2 foam pads. And some sanding screen in the grits that you need if you will be sanding off the finish on any project.
Goodluck!