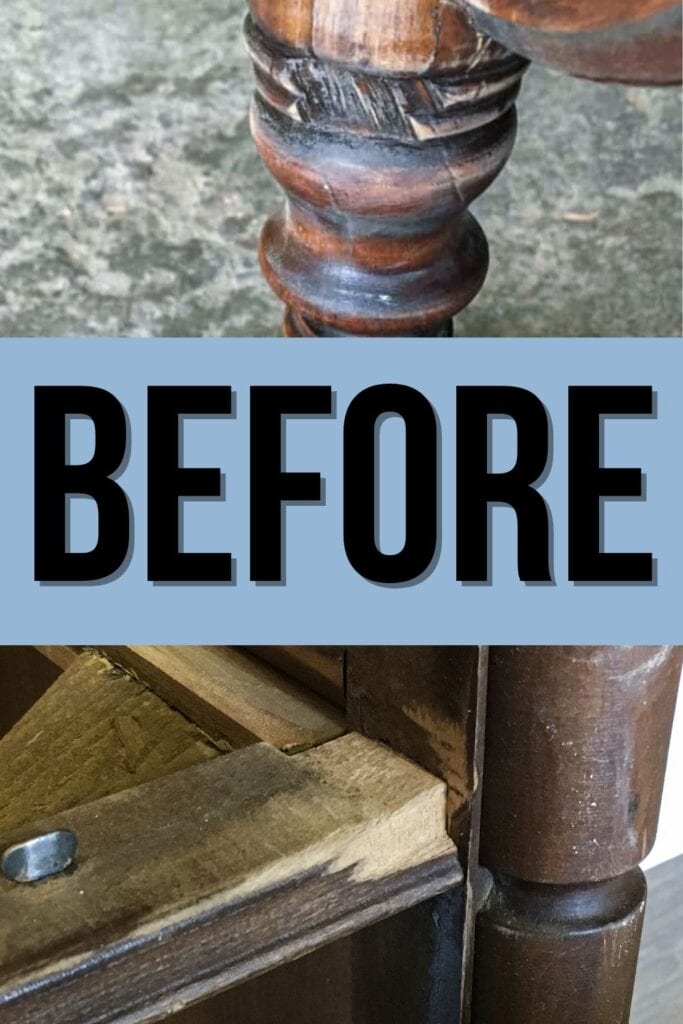
How to Repair Broken Trim on Furniture
When the trim or detail are either missing, broken off or damaged on old pieces of furniture, don’t pass them up or throw them out! I’m going to show you how to easily fix that broken trim work on vintage, antique furniture or thrifted furniture.
Get more of my favorite tips for repairing old furniture here!
Fixing the wood trim on old pieces of furniture is easier than you may expect! And I’m sure you have most of these tools in your own home already!

Supplies Used to Repair Broken Trim on Furniture
As an Amazon Associate, I earn from qualifying purchases. I also may earn from other qualifying purchases with other companies or get free product to review and use. All opinions are my own.
- Piece of Trim to Duplicate
- Pam / Vaseline
- Hot Glue Gun & Glue Sticks
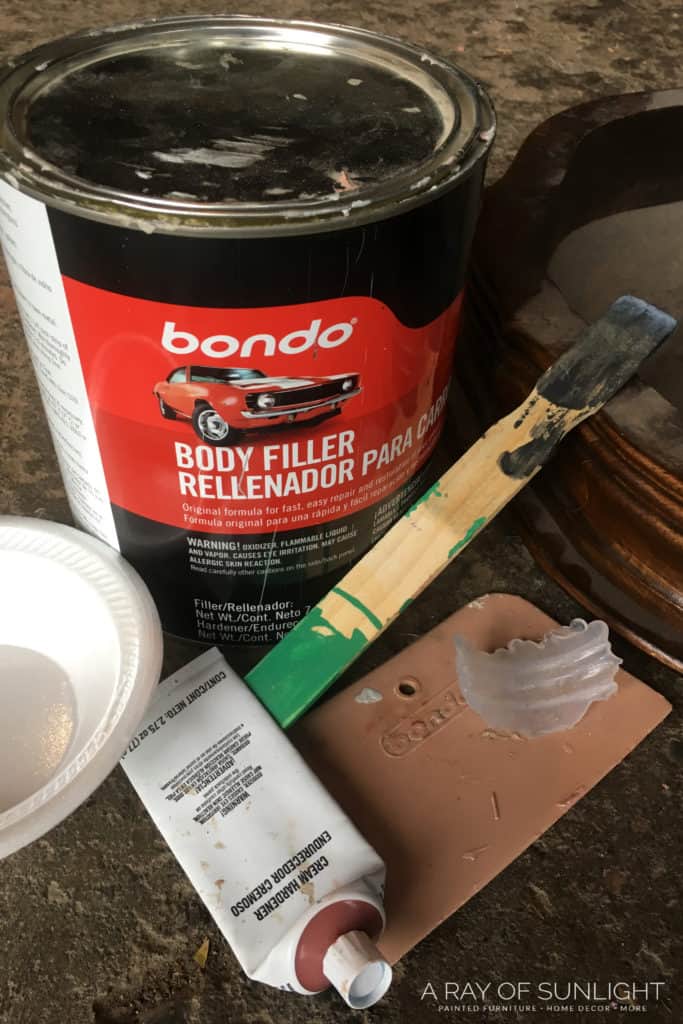
- Bondo
- Utility Knife
- Sandpaper
Find the Twin of the Broken Trim
First you need to find a matching piece of trim. Most pieces of furniture have at least two pieces of matching trim. One on either side of the piece of furniture.
So look to the opposite side of the furniture and see if that same detailed wood is still intact on the other side.
Basically the goal is to use the twin of the broken trim to make a new piece that looks exactly like the broken one. You can also use this method to recreate broken feet, corners, detailed grooves, etc.
You can even take a detail from a different piece of furniture and put it on a completely different piece of furniture. Once you have the mold, the sky is the limit.
How To Make Details And Trim With Hot Glue and Bondo
Grease the area or trim piece that you are duplicating. I’ve used Vaseline or Pam cooking spray.
The goal is to grease that area so you can get the glue off. If you skip this step, you might have a hard time removing the glue. This will make it easy to get the hot glue off of the trim work.
With a hot glue gun, completely cover the trim / detail with hot glue. The hot glue needs to get into the details, and completely cover the area you want to duplicate.
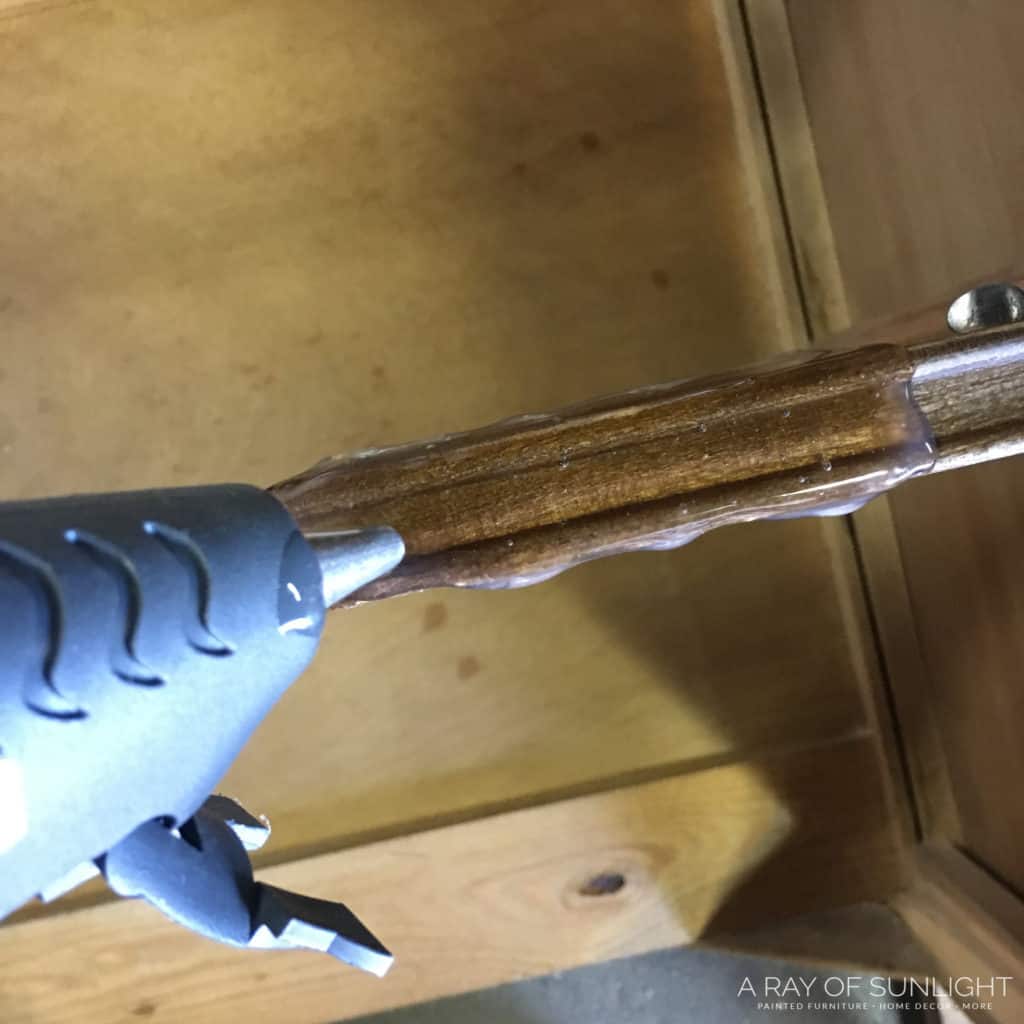
Let the glue cool completely and dry. This will create a mold of the detail. Carefully take off the glue mold. Now you can use the mold to create more trim, or to fix areas of damaged trim.
Be sure to grease the mold before putting any type of product in it.
Once the new trim piece is created out of Bondo, use a utility knife to shave off the excess Bondo before it dries hard. Then sand the edges and details to form the trim better.
We choose to use Bondo because of how strong it dries. This stuff dries super hard and is very strong. If you’re only wanting to create some pretty details, I’m sure you could use a clay of some sort instead.
Here is a video that shows the same process!
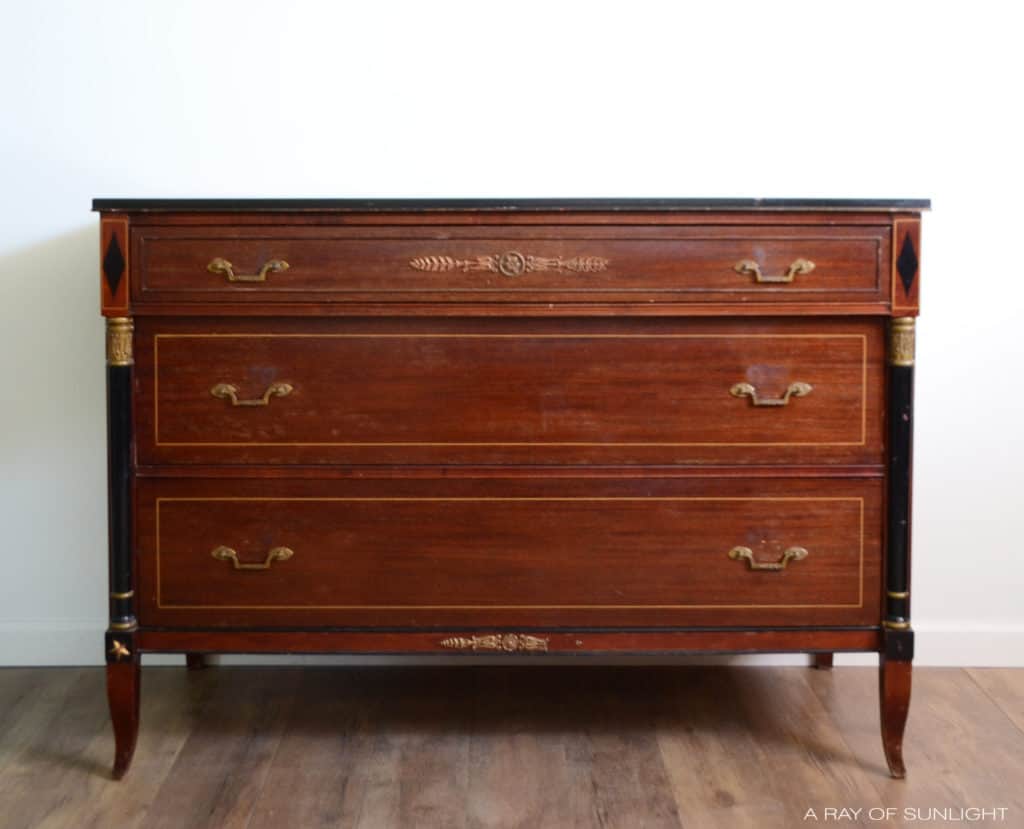
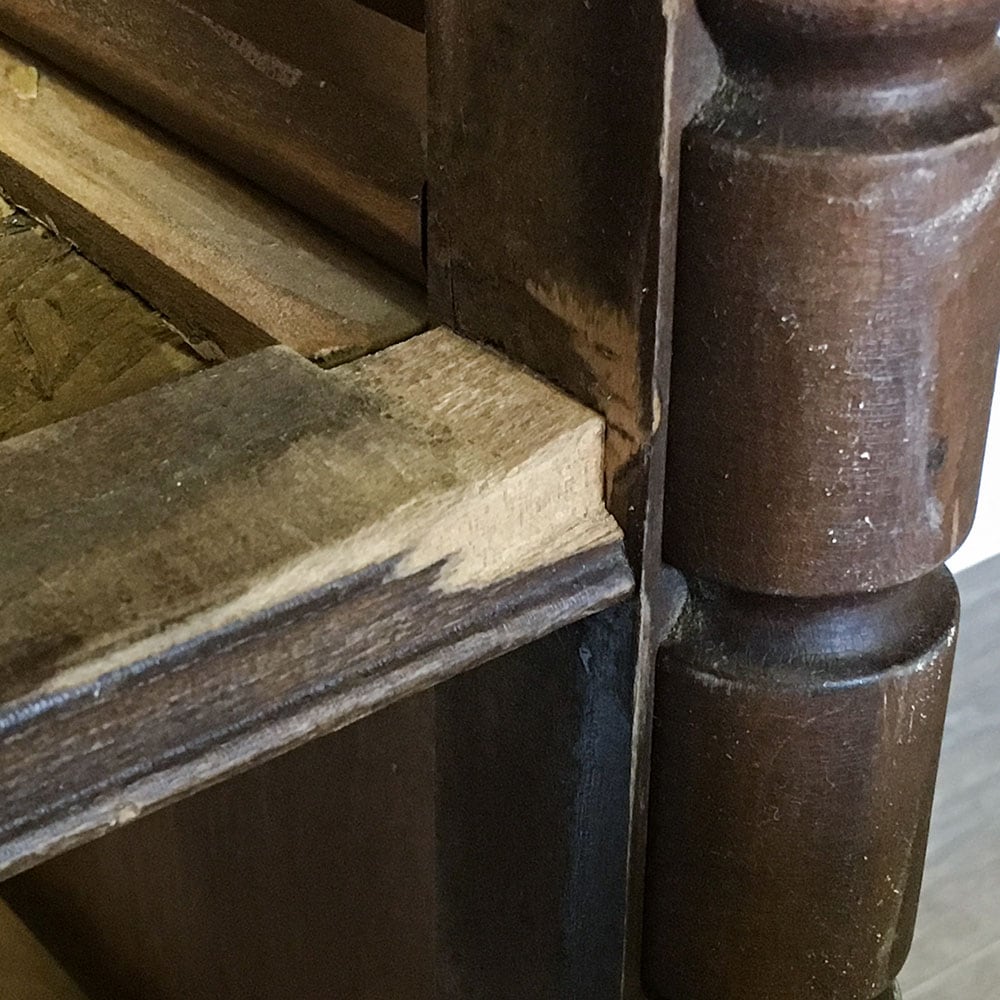
Repair Broken Trim on a Dresser
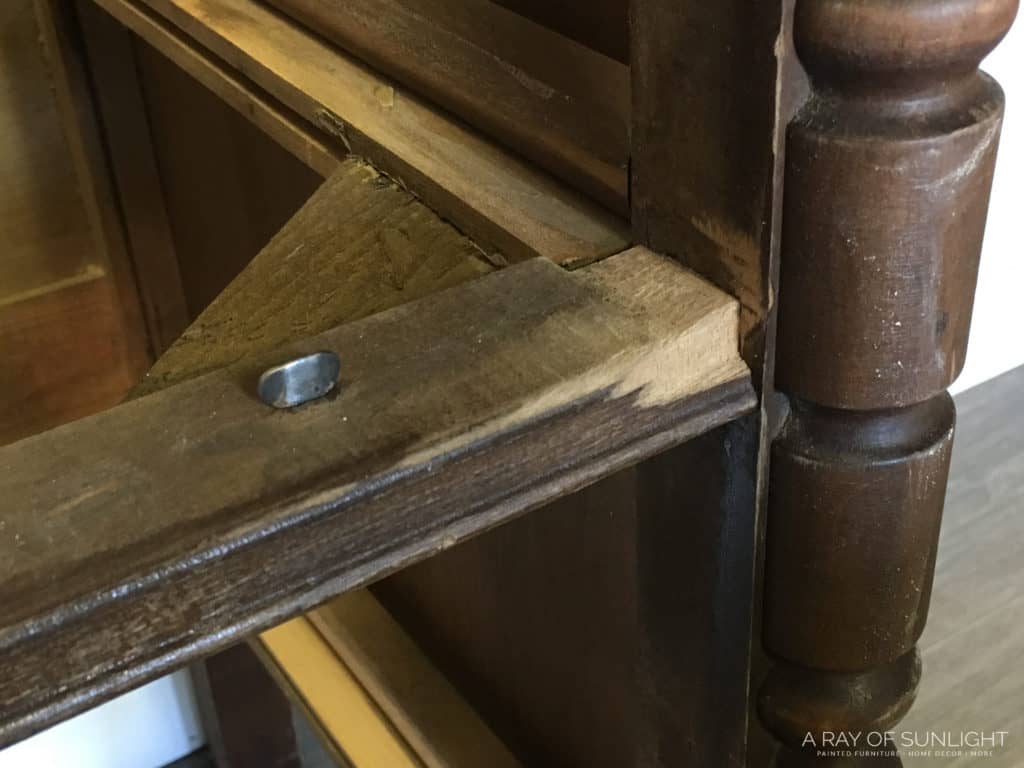
On this dresser, a small amount of trim was chipped off of the structural frame below the drawer.
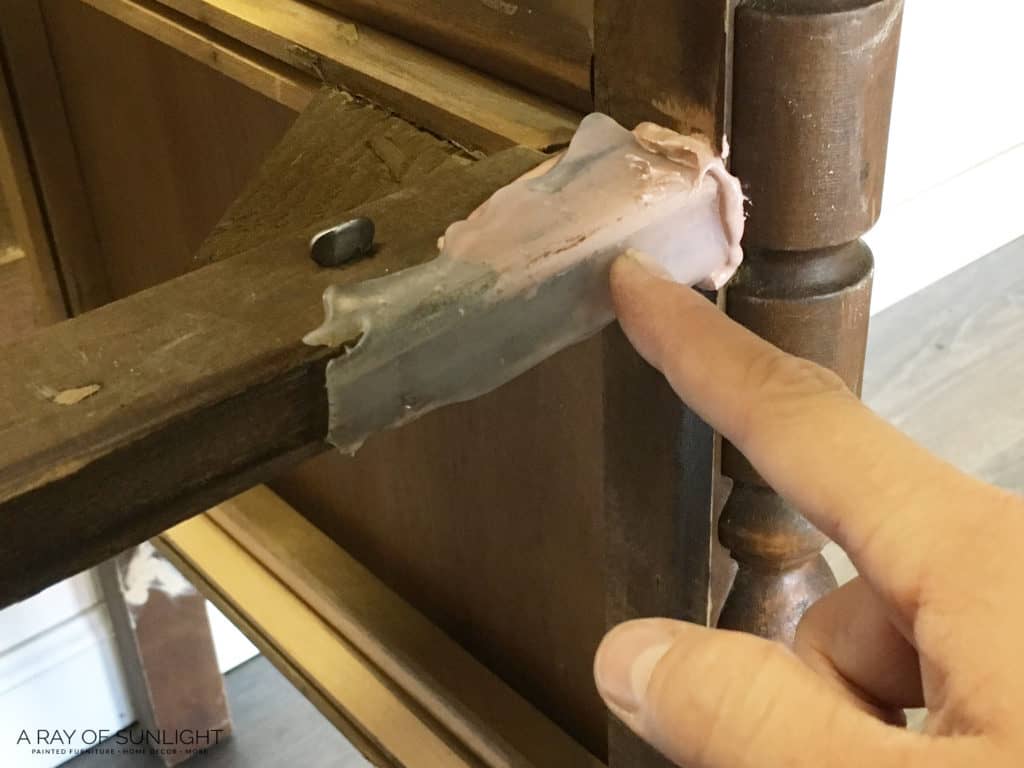
Make a mold of the same trim. Use a sharp utility knife to cut a straight edge on the mold (so it can sit right next to the edge of the leg).
Smother Bondo onto the damaged trim and place the greased mold over the Bondo. Press the mold into place until the Bondo starts to harden.
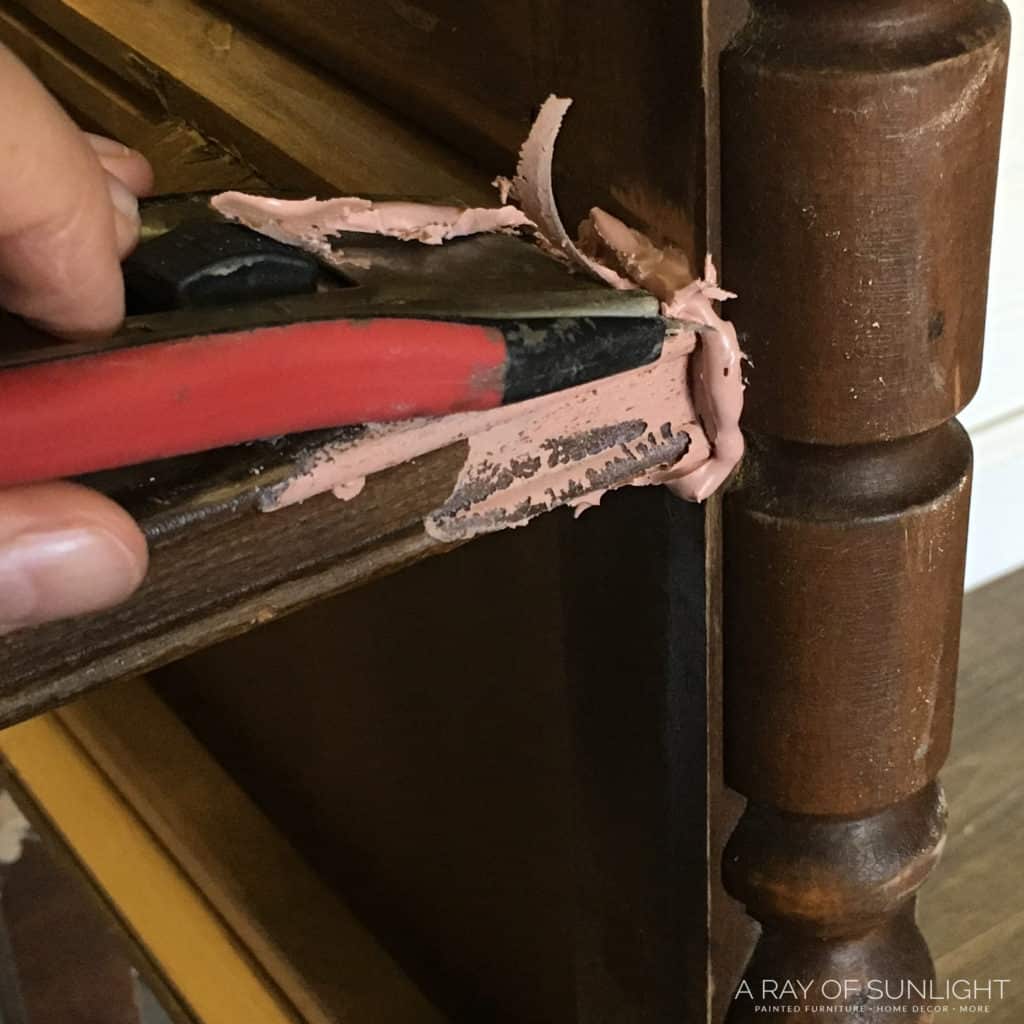
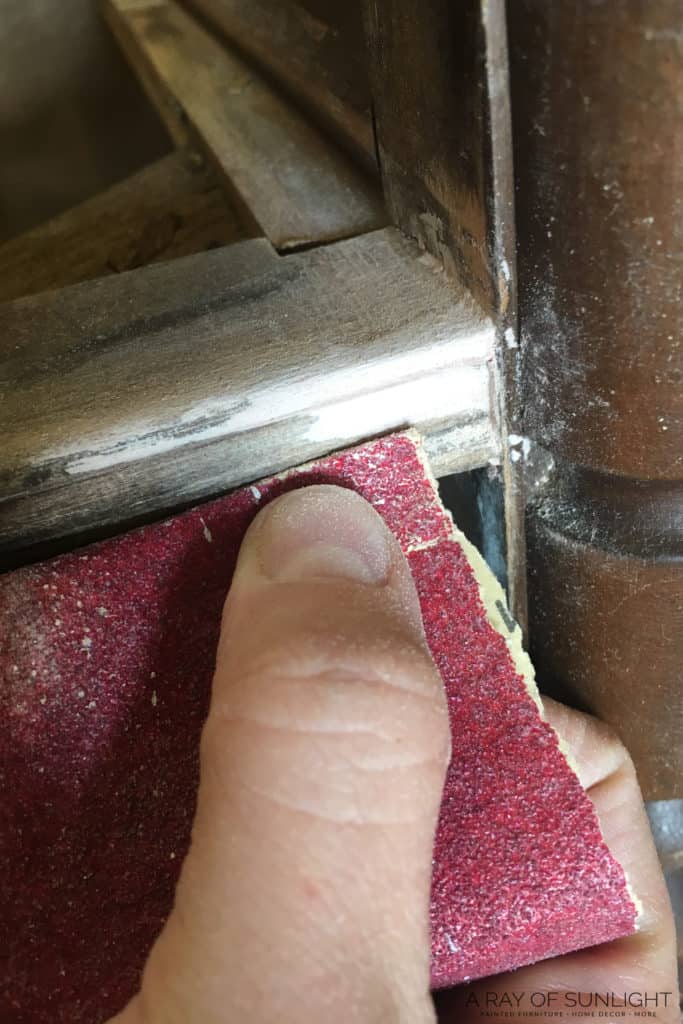
Don’t let the Bondo sit too long or it will get too hard to shape. Use the utility knife to shave off excess Bondo. Let the Bondo dry completely then sand the Bondo and surrounding areas down until completely smooth.
This method works with so many different variations too!! Once the Bondo is dry and shaped, it’s ready for paint!
Note: If there isn’t another piece of trim that matches what you’re wanting to fix, there are a couple of things you can do. Either take off the trim completely to make a cohesive look, or find another piece of detail on the furniture that you like, and use that as a guide.
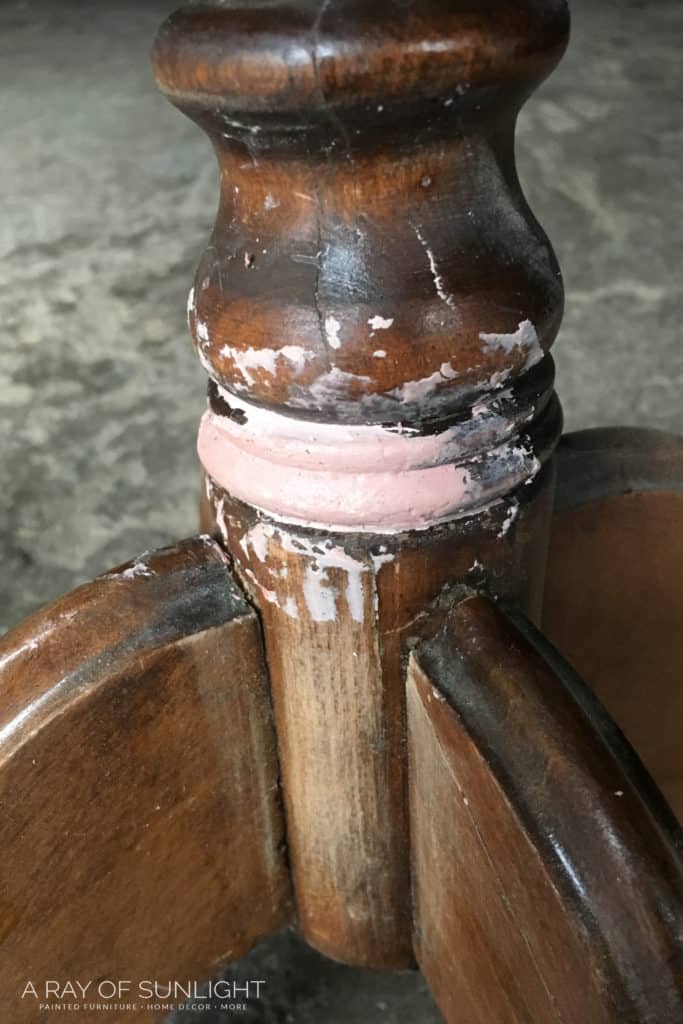
Repair Broken Trim on an End Table
On this table, part of the detail was chipped off.
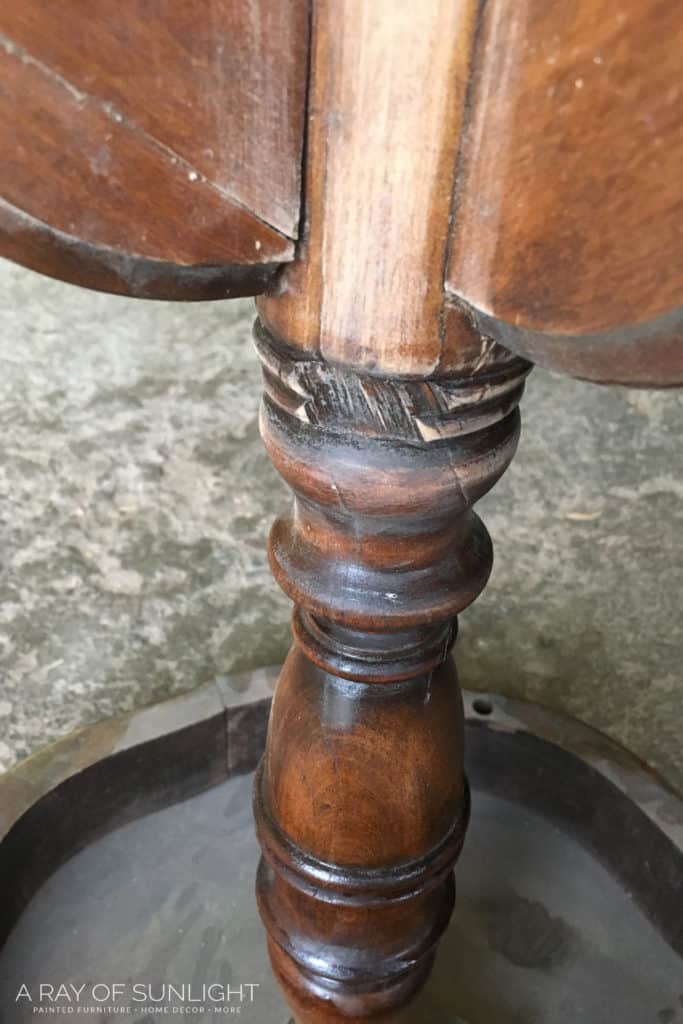
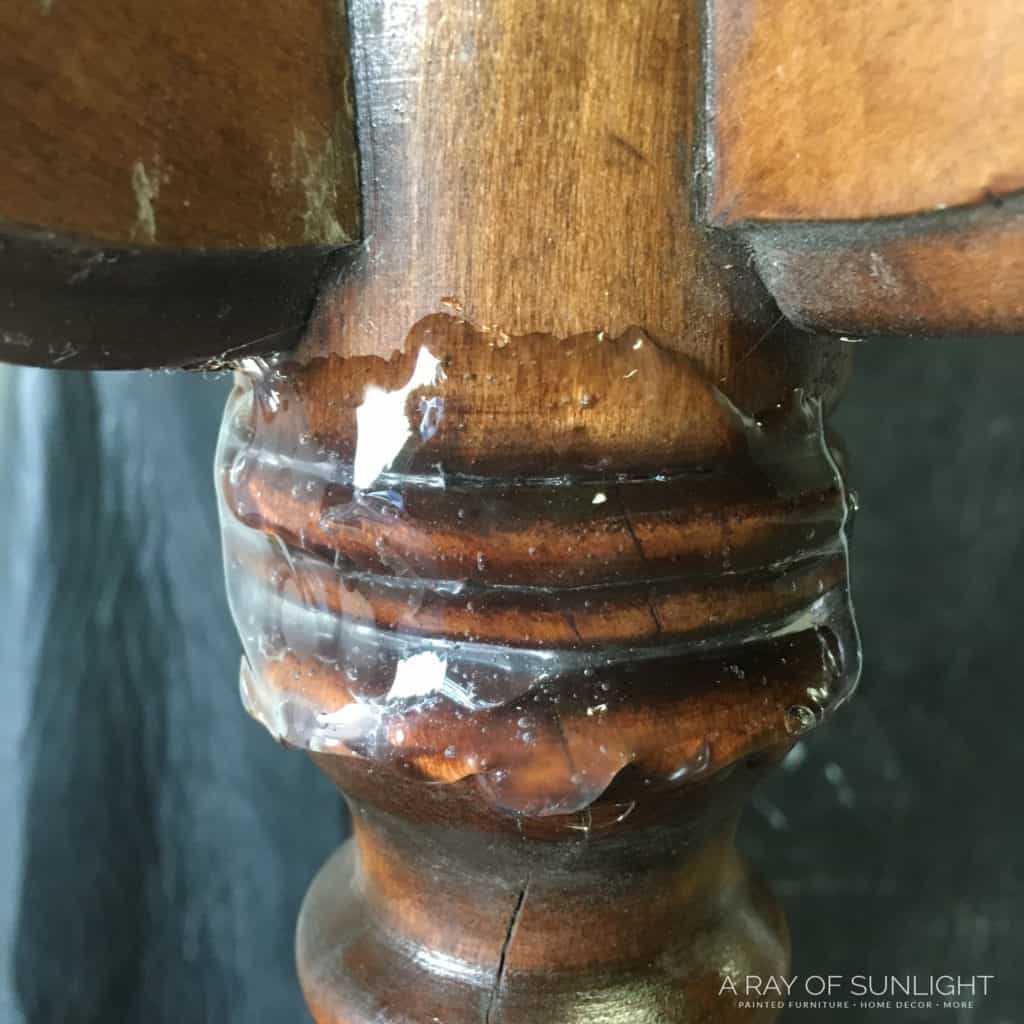
So we made a mold on the other side of the table leg, put an excessive amount of Bondo over the broken area, then squished the mold onto the table.

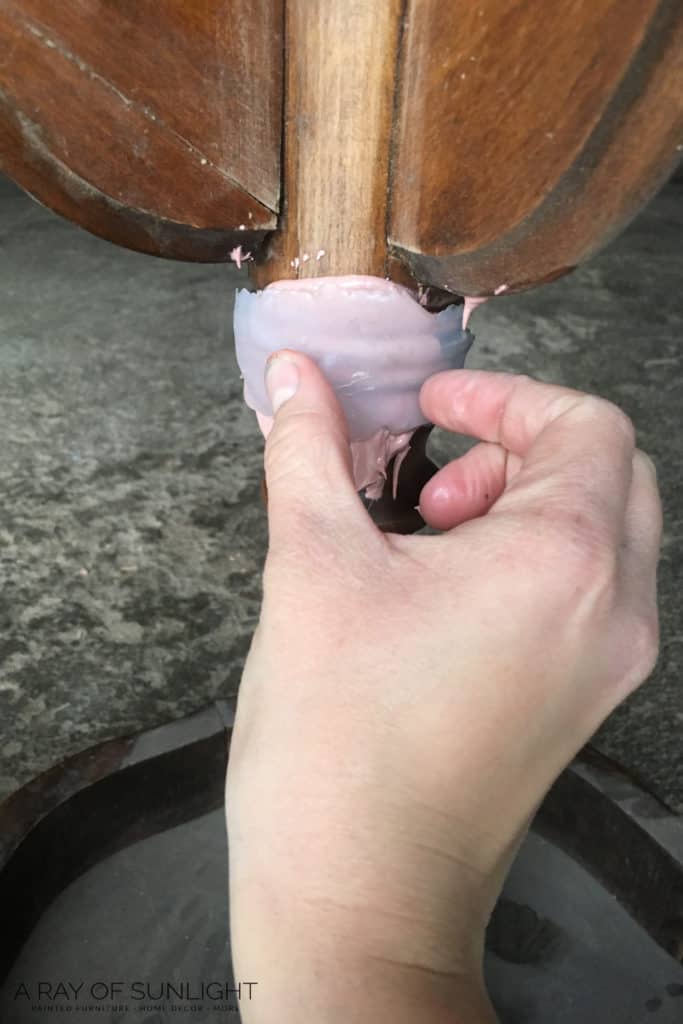
We held the mold until it was firm, but not completely hard (about 4 minutes). Then we used a sharp utility blade to cut off the excess Bondo and form the Bondo even more into the shape we wanted.
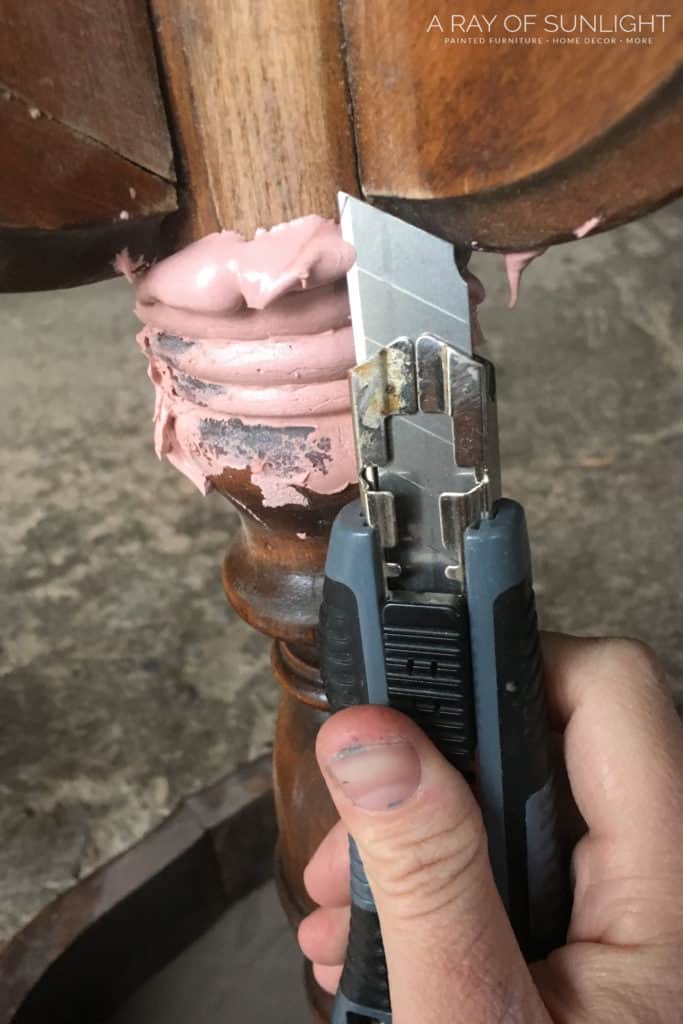
It’s best to do this quickly, and once the Bondo is just barely set. If you wait too long the Bondo will be too hard to cut. At that point sanding is the only option, and that’s a pain!
After the Bondo was shaped, we let it dry completely, and then sanded off the thin remains and shaped it a little better with 220 grit sandpaper.
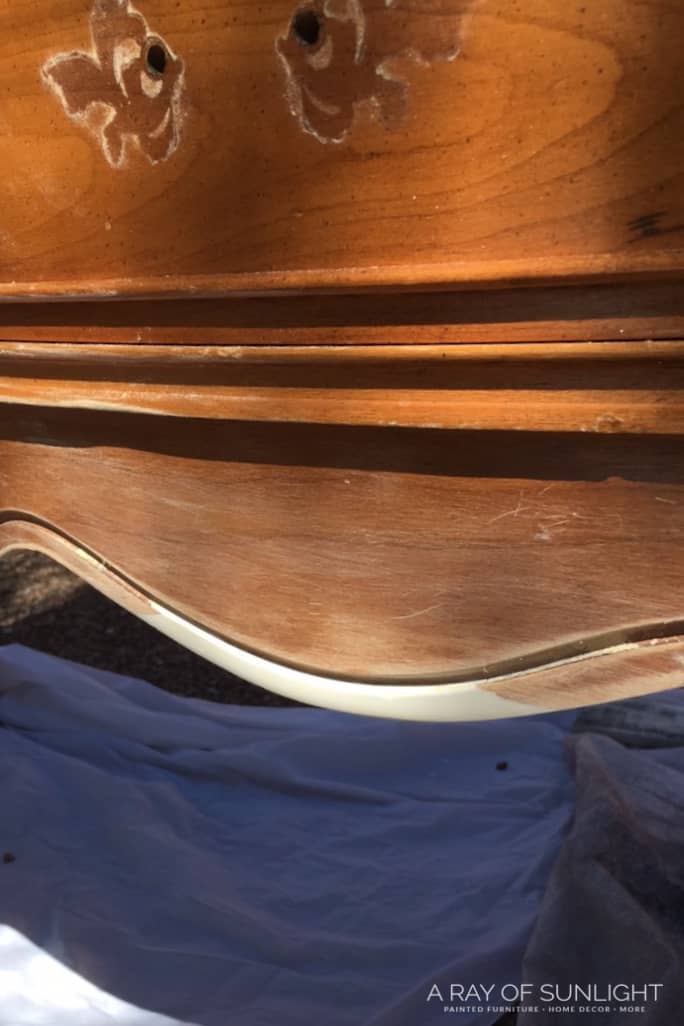
Repair Broken Bottom Trim on a Dresser
On another dresser, the bottom detail had broken off. For this one, we basically reversed the mold method, and used the mold to create a dam where the Bondo couldn’t go.
First we created a mold of the carved out detail. I made sure the glue didn’t run out of the carved detail, but only filled in the carving.
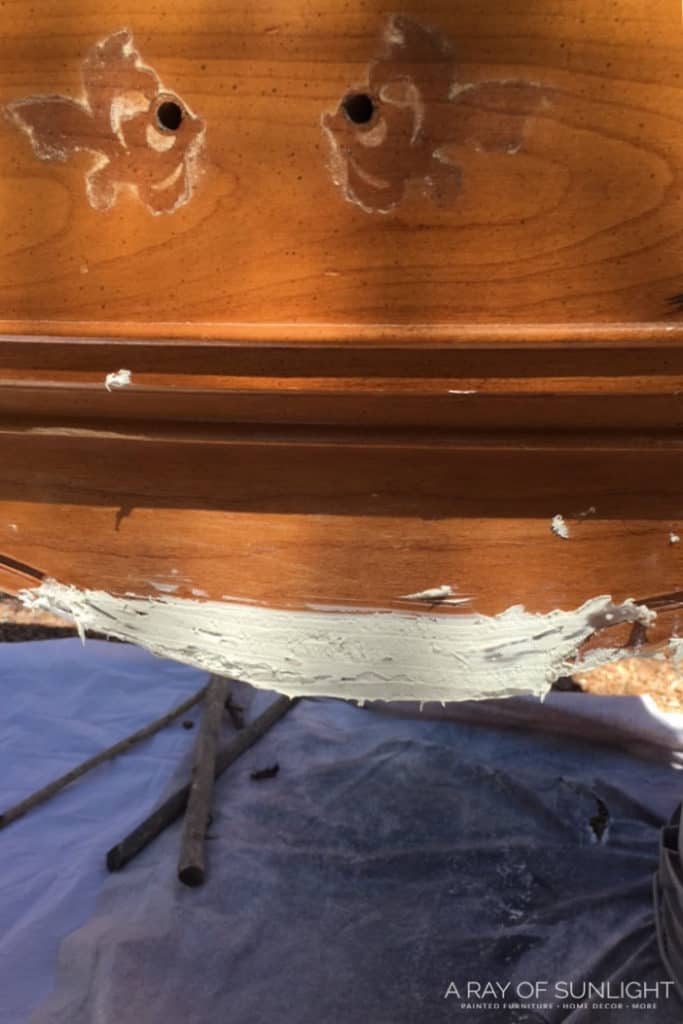
Once it was dry, I removed the glue, greased it, and placed it in the carving right above the missing wood. Then I slathered the Bondo over the area with the missing wood.
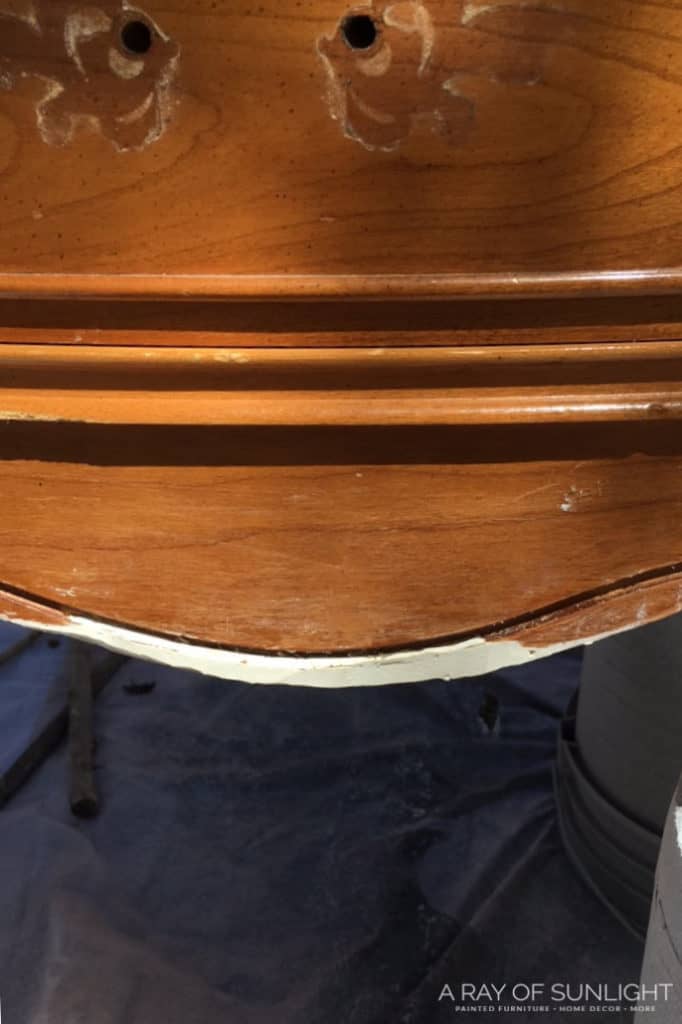
This time I removed the glue mold before the Bondo started to set up. This was a little tricky to do without messing up the Bondo.
Then I let the Bondo set up for a few minutes before I started to shape it with the utility knife. Once the Bondo was completely dry, I was able to sand it down to the perfect shape with 220 grit sandpaper.

There are so many ways you can use this same method to create new detail, fix old details or let your imagination run wild.
You can use the same methods to recreate a broken corner, recreate a broken leg, make new details, the list goes on and on.
Get the Secrets!
Grab this super convenient How to Repair Furniture Ebook with all of our secrets on how to repair furniture for only $14.
You can print it out and have instant access whenever you come across damaged furniture, and know exactly how to fix it!
Click on the picture of the book to purchase!

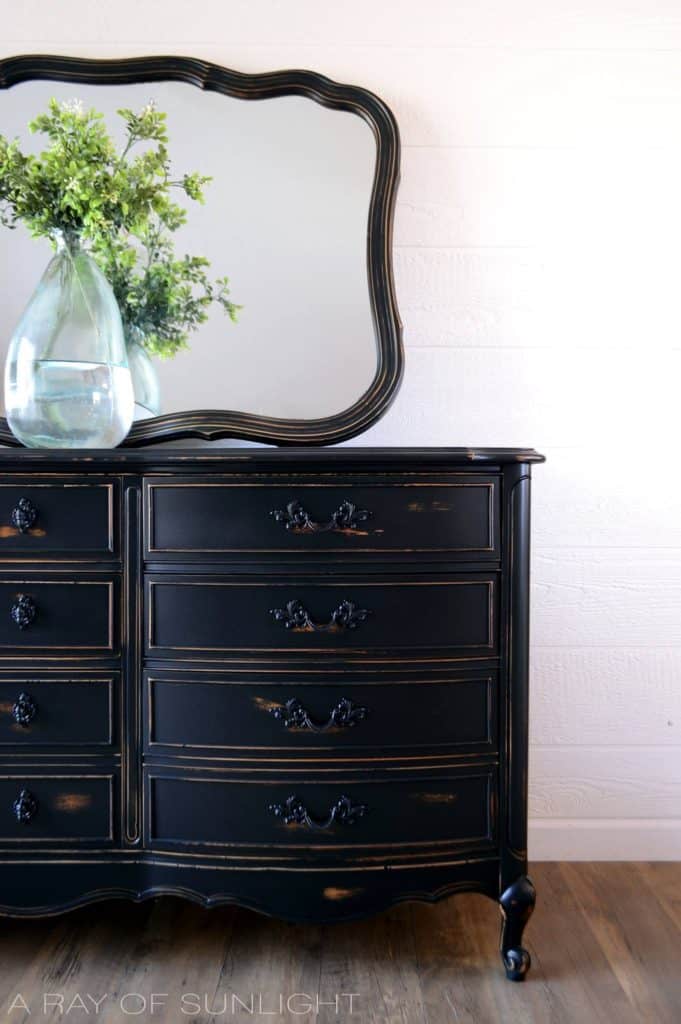
But the next time you see an old piece of furniture, you’ll know how to fix it instead of passing it up. Now don’t make these five biggest furniture painting mistakes!
How to Repair Broken Trim on Furniture
When the trim or detail are either missing, broken off or damaged on old pieces of furniture, don’t pass them up or throw them out! I’m going to show you how to easily fix that broken trim work on vintage, antique furniture or thrifted furniture.
Materials
- Piece of Trim to Duplicate
- Pam / Vaseline
- Hot Glue Gun & Glue Sticks
- Bondo
- Sandpaper
Tools
Instructions
- First you need to find a matching piece of the broken trim. Use the twin of the broken trim to make a new piece that looks exactly like the broken one.
- Grease the area or trim piece that you are duplicating with Vaseline.
- With a hot glue gun, completely cover the trim / detail with hot glue. The hot glue needs to get into the details, and completely cover the area you want to duplicate. Let the glue cool completely and dry. This will create a mold of the detail.
- Carefully take off the glue mold.
- Smother Bondo onto the damaged trim and place the greased mold over the Bondo. Press the mold into place until the Bondo starts to harden. Don’t let the Bondo sit too long or it will get too hard to shape.
- Use the utility knife to shave off excess Bondo. Let the Bondo dry completely then sand the Bondo and surrounding areas down until completely smooth.
- Once the Bondo is dry and shaped, it’s ready for paint!
Recommended Products
As an Amazon Associate and member of other affiliate programs, I earn from qualifying purchases.


More Repairing Furniture Resources
- How to Repair Rattan Furniture
- Repairing Veneer with Wood Filler
- How To Fix A Missing Chunk Of Wood
- How To Fix Old Dresser Drawers From Falling Out
- Cane Furniture Repair

Follow us on YouTube to get more tips for painting furniture.
Or share your project with us on our Facebook Group and be part of our community. See you there!
I just bought a small table, with a piece of trim missing. I will see if this works. I’ll take before and after photos.
I have a very ornate desk that is missing a section under the drawers on one side. How can a mould be done for a part that is the mirror image of that part?
I like how you said that most pieces of furniture have at least two pieces of matching trim. My mom told me that she would like to find a way to repair her old table because it has been in the family for centuries.
Goodluck with the repairs!
Howdy! I could have sworn I’ve been to this blog
before but after browsing through some of the post I realized it’s new
to me. Anyhow, I’m definitely happy I found it and I’ll be book-marking and checking
back frequently!
Thank you so much for the kind words! I appreciate it!
Nice post!
Would you use bondo on big surface thats on the front of a piece? Will the paint still show a difference in finish?
Hey Amber!
It’s best to apply some type of primer over the Bondo, as well as the rest of the piece to create an even paint finish. I personally love to use this (affiliate link) shellac. If it isn’t super smooth with the wood that surrounds the Bondo, you will see an outline of where the Bondo is. So just make sure it is super smooth with the surface. Also, if your wood has a lot of grain to it, you can mimic the wood grain in the bondo by making little marks with a utility knife in the bondo. Hope that helps!
Hello Natalie, came across your post while searching how to repair trim. Loved you post, but I’m not understanding the “reverse mold” method. Would you be able to give me more detail please?
Thanks!
Hey Tina!
Instead of filling in the hot glue mold with bondo, I used the hot glue mold to keep the bondo away from the area. So it’s just opposite of what I had been talking about.
What paint color did you use on the buffet piece?
Hey Bonnie! I used homemade chalk paint with regular black latex paint.
I can’t wait to try this out on an old desk I found! Ever since we’ve transitioned to a work from home set up, I’ve been trying to put together my dream office. I got the walls painted, wood floors resurfaced, and found good pieces of used furniture to try and be a little more green. I’m super excited to see how well your project works for me.
What if need to stain the repaired piece? You can’t stain bondo can you?
You can! Here’s a post that explains how to stain bondo. https://arayofsunlight.com/repair-stain-chipped-veneer-furniture/
I have a table that is missing a piece. It is made out of that fake concrete looking stuff. The stuff they make garden figurines out off. Do you think bondo would work on it
I don’t see why not.